
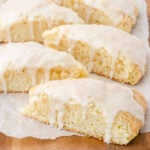
Vanilla lovers, it's time to celebrate! You'll love this easy brunch recipe that's tender, buttery, and full of vanilla flavor.

Table of Contents
❤️ Why you'll love it
- These moist scones have so much deep vanilla flavor you'll never scoff at "plain vanilla" again.
- Buttery and tender - perfect for lazy weekend brunches and cozy afternoon teas.
- These simple scones are easy to make with step by step instructions!
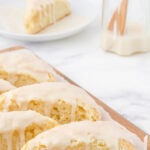
So quick to make and these vanilla bean scones with their fragrant vanilla glaze will have you feeling all Downton Abbey in no time at all!
It's the best scone recipe for all your romantic Victorian tea fantasies!
Summertime? These are perfect with this Brazilian iced coffee for brunch.
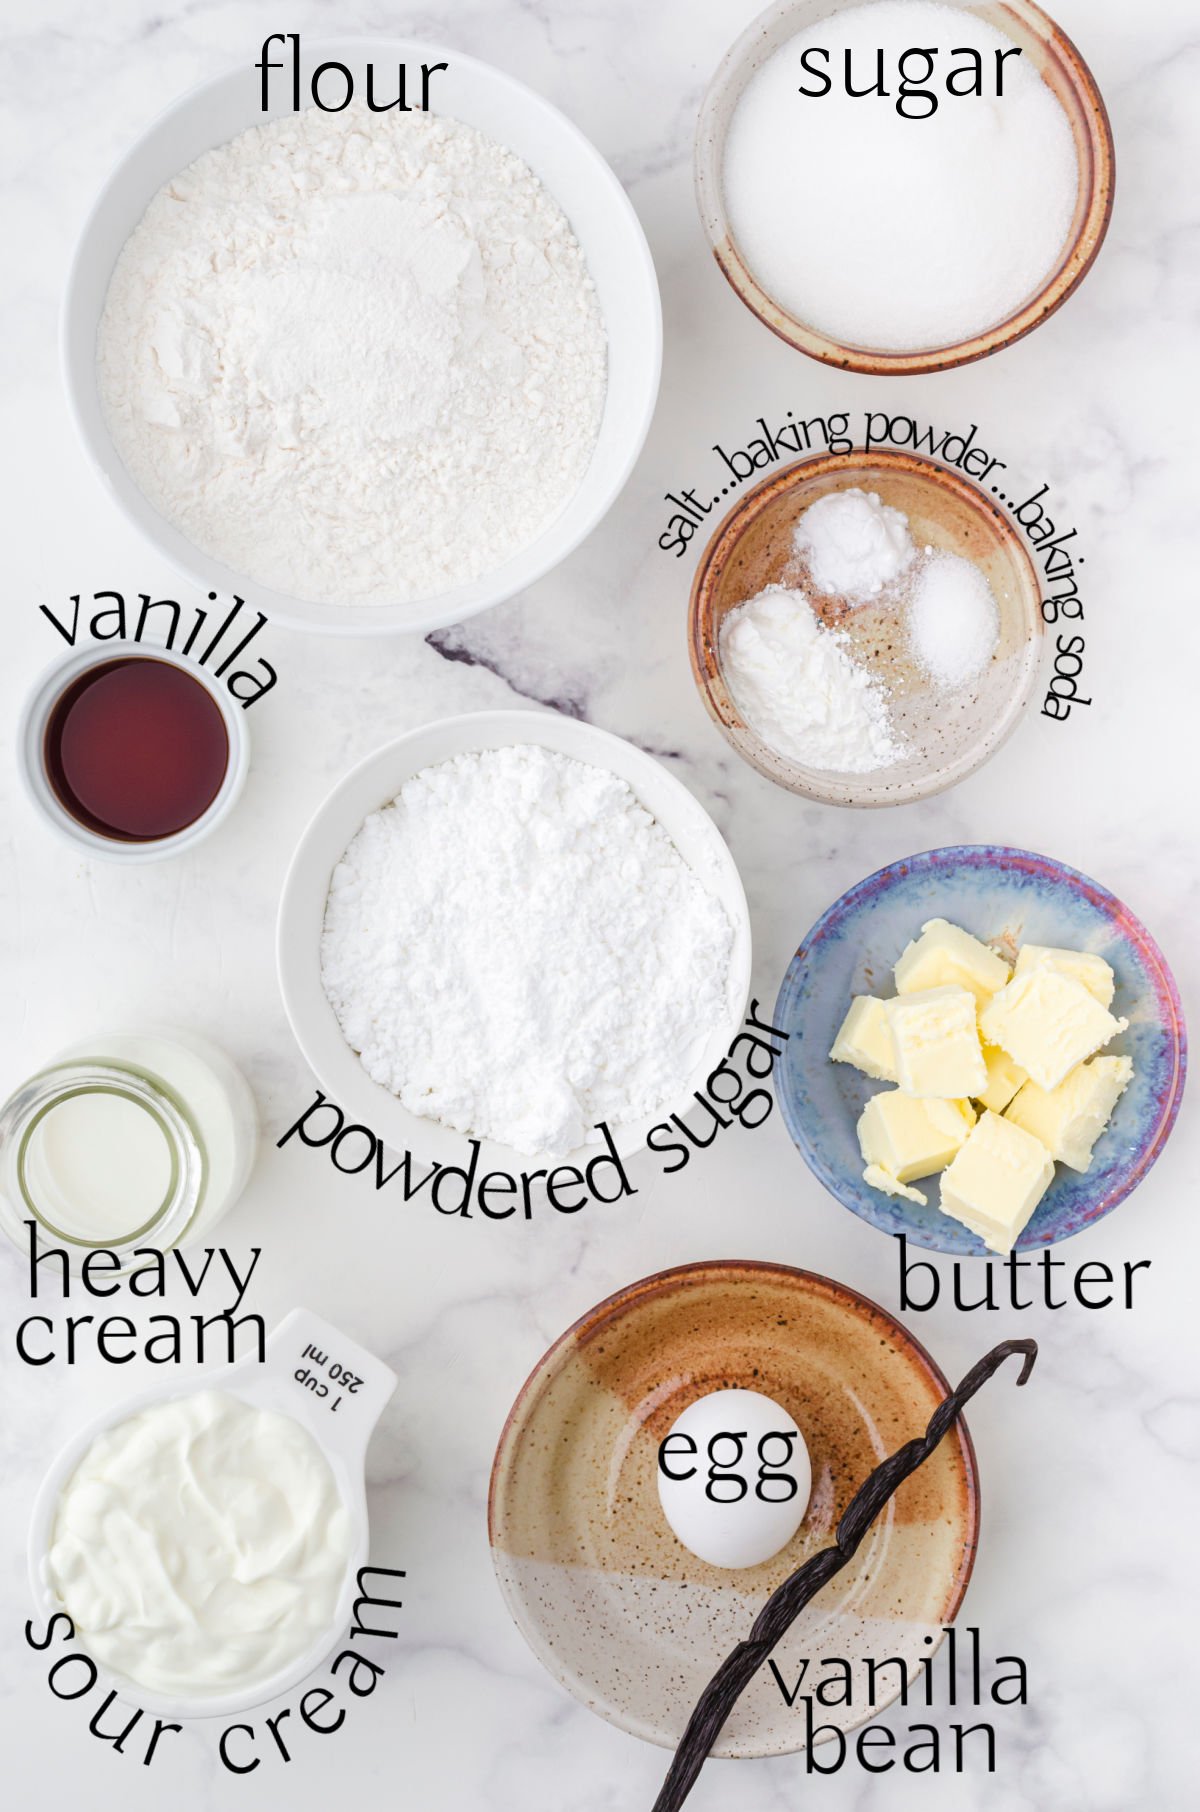
🧾 Ingredients
🔪 Instructions
Note: This is an overview of the instructions. The full instructions are in the green recipe card below.
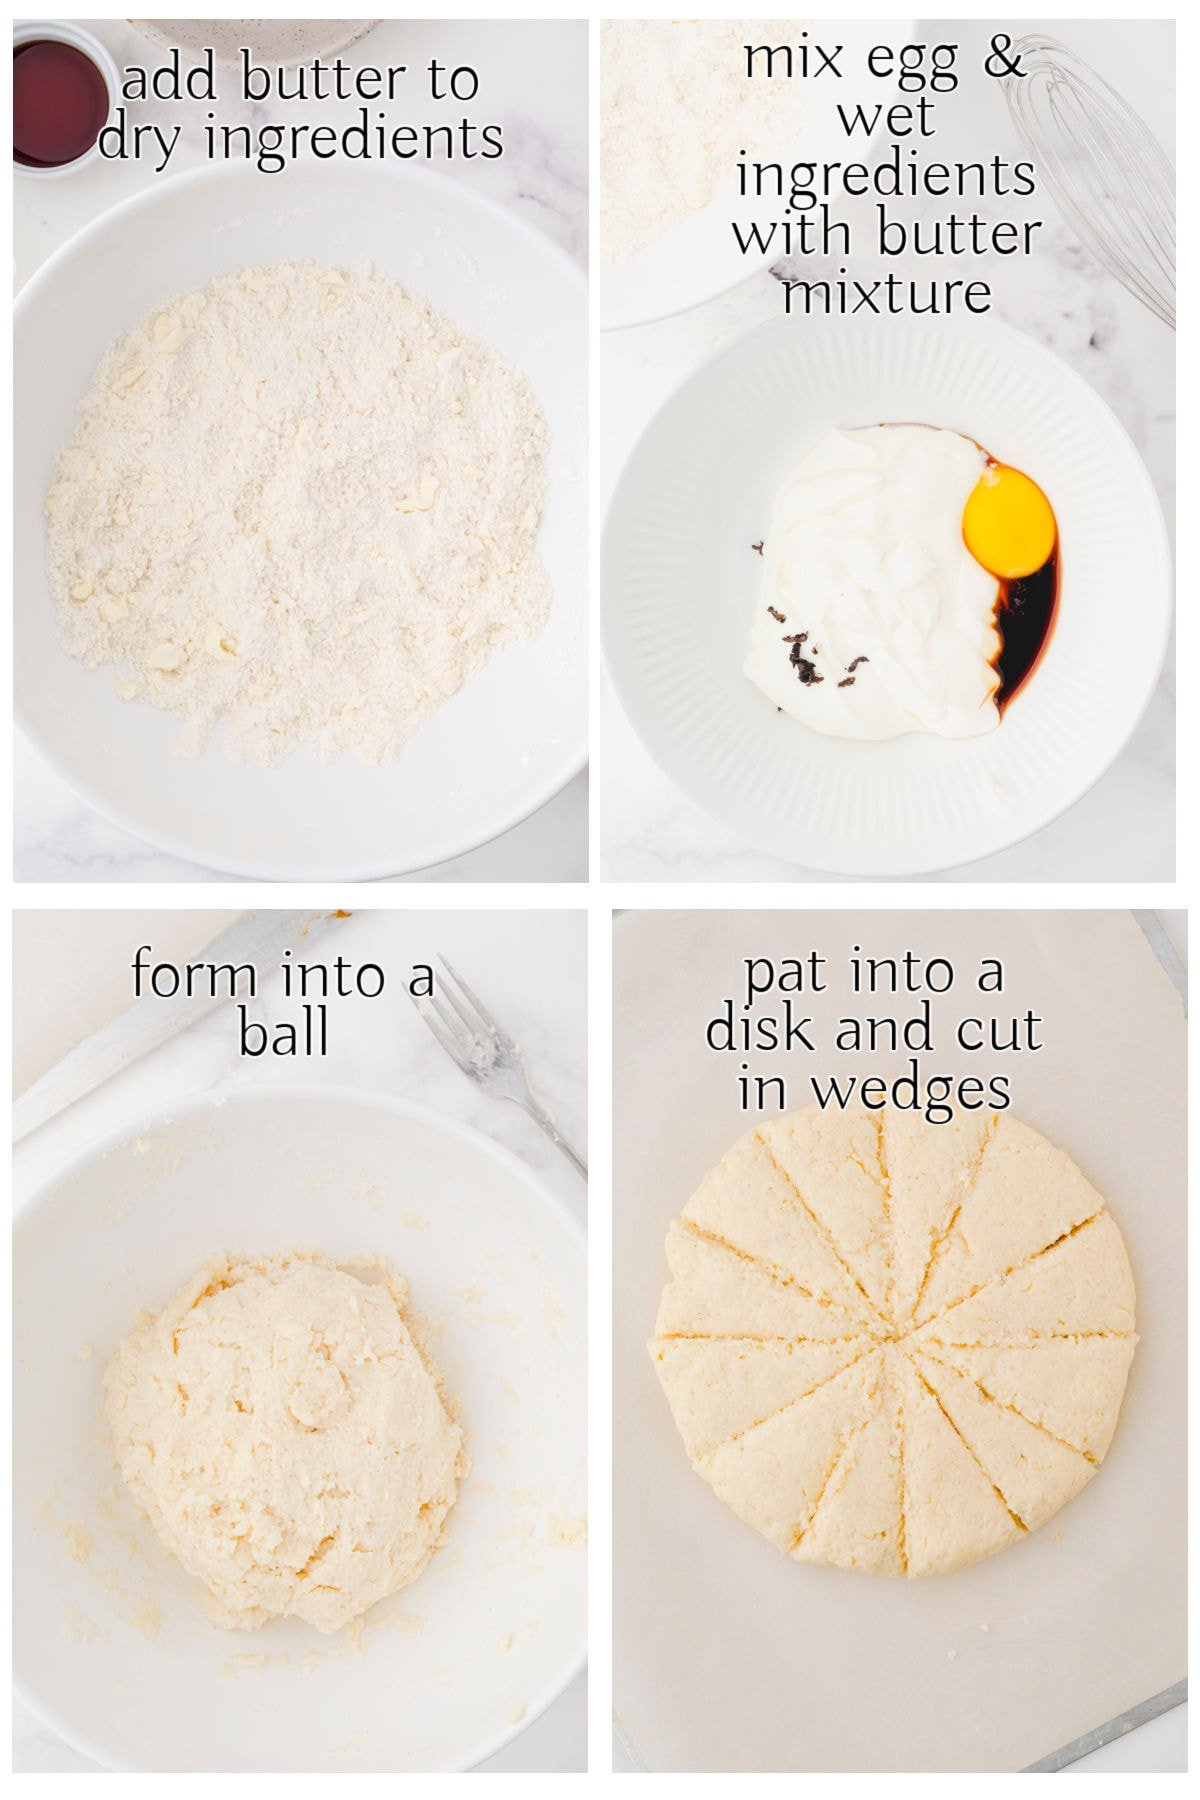
- Stir the dry ingredients together. Cut the butter into smaller bits and rub the ice cold pieces of butter into the dry ingredients or use a pastry blender - it will look a but like coarse meal.
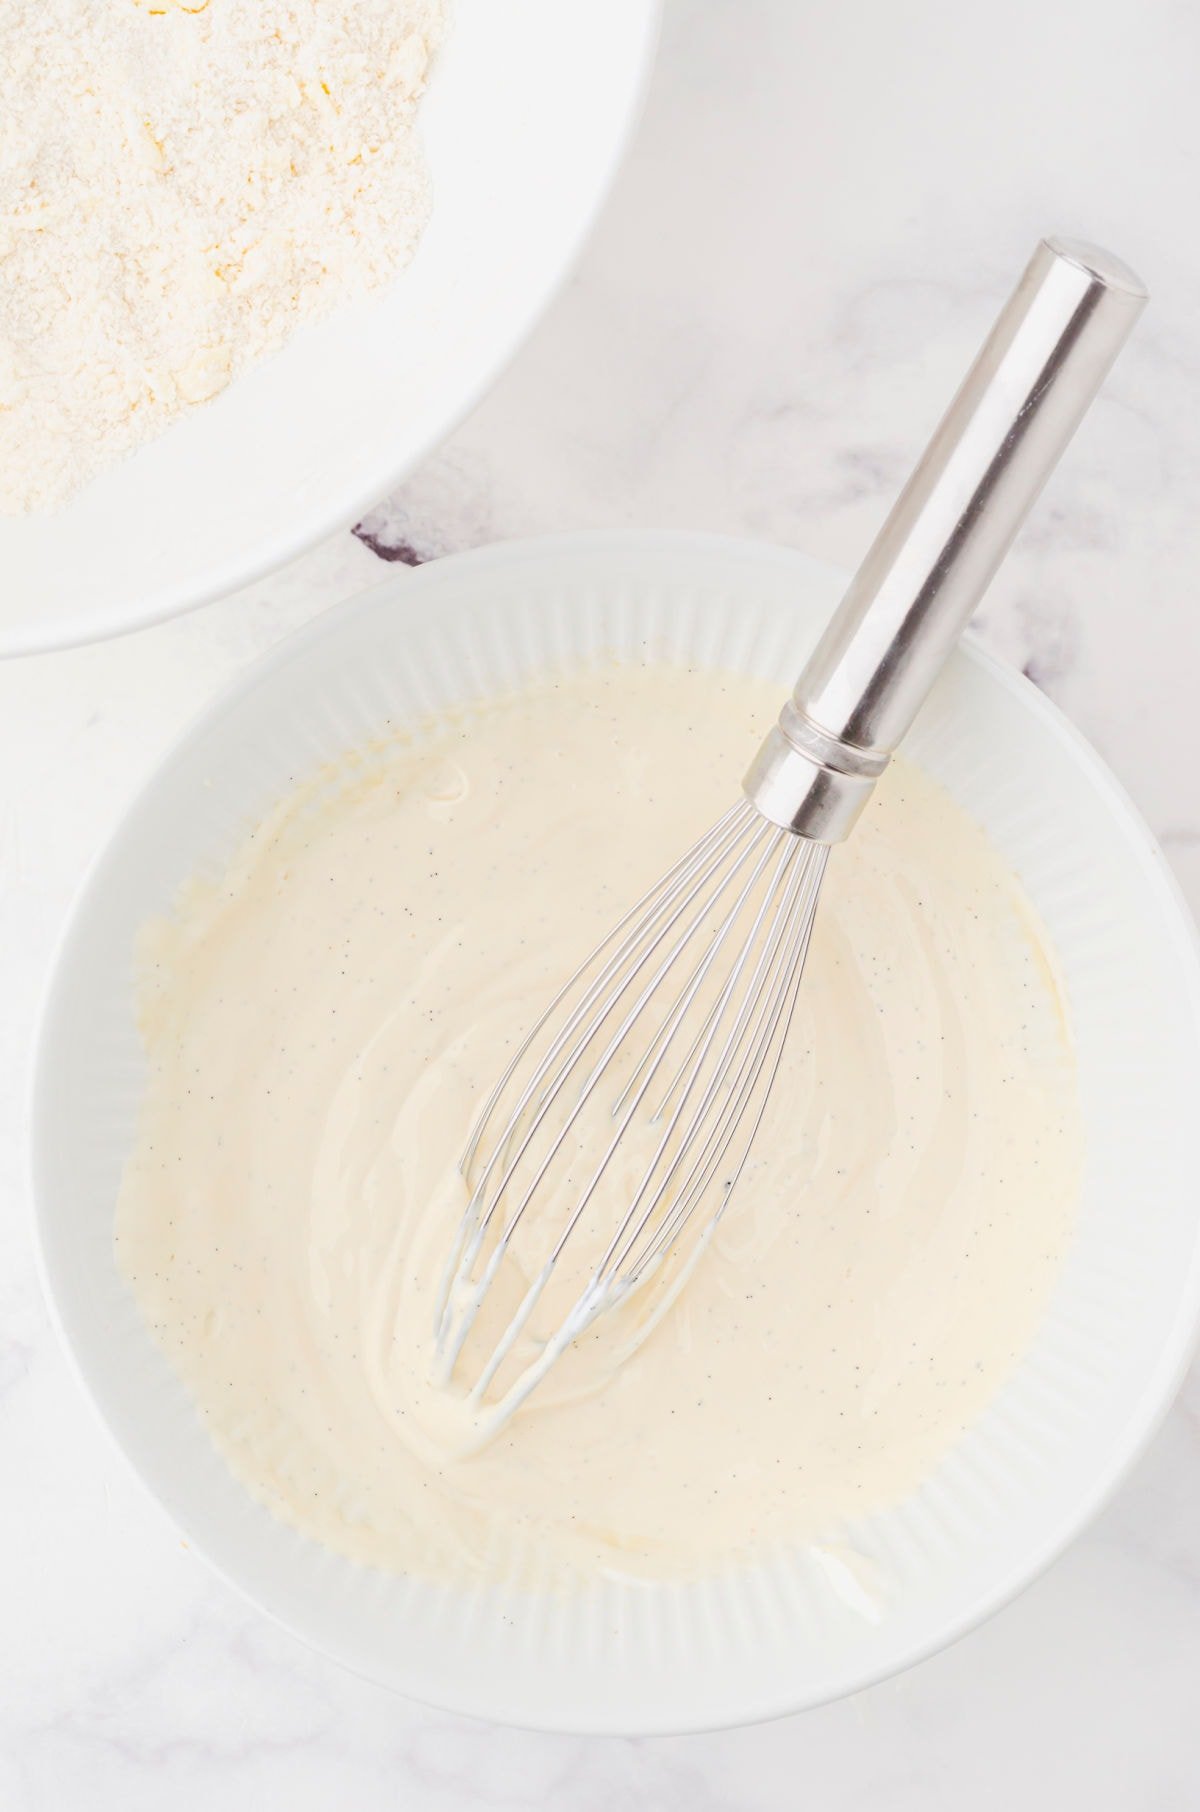
- In a different bowl mix the egg yolk, vanilla extract, and sour cream. Cut the vanilla bean in half and scrape the seeds from the half into the egg mixture. Whisk smooth.
- Add to the flour mixture stirring with a fork until the dough forms a ball.
- Place the dough on parchment or silpat lined baking sheet and pat down into a disk. Cut into wedges with a sharp knife but don't separate. Bake until golden brown.
While the vanilla scones are baking mix the glaze ingredients and whisk smooth. You may need to add a bit more cream to get the consistency you want.
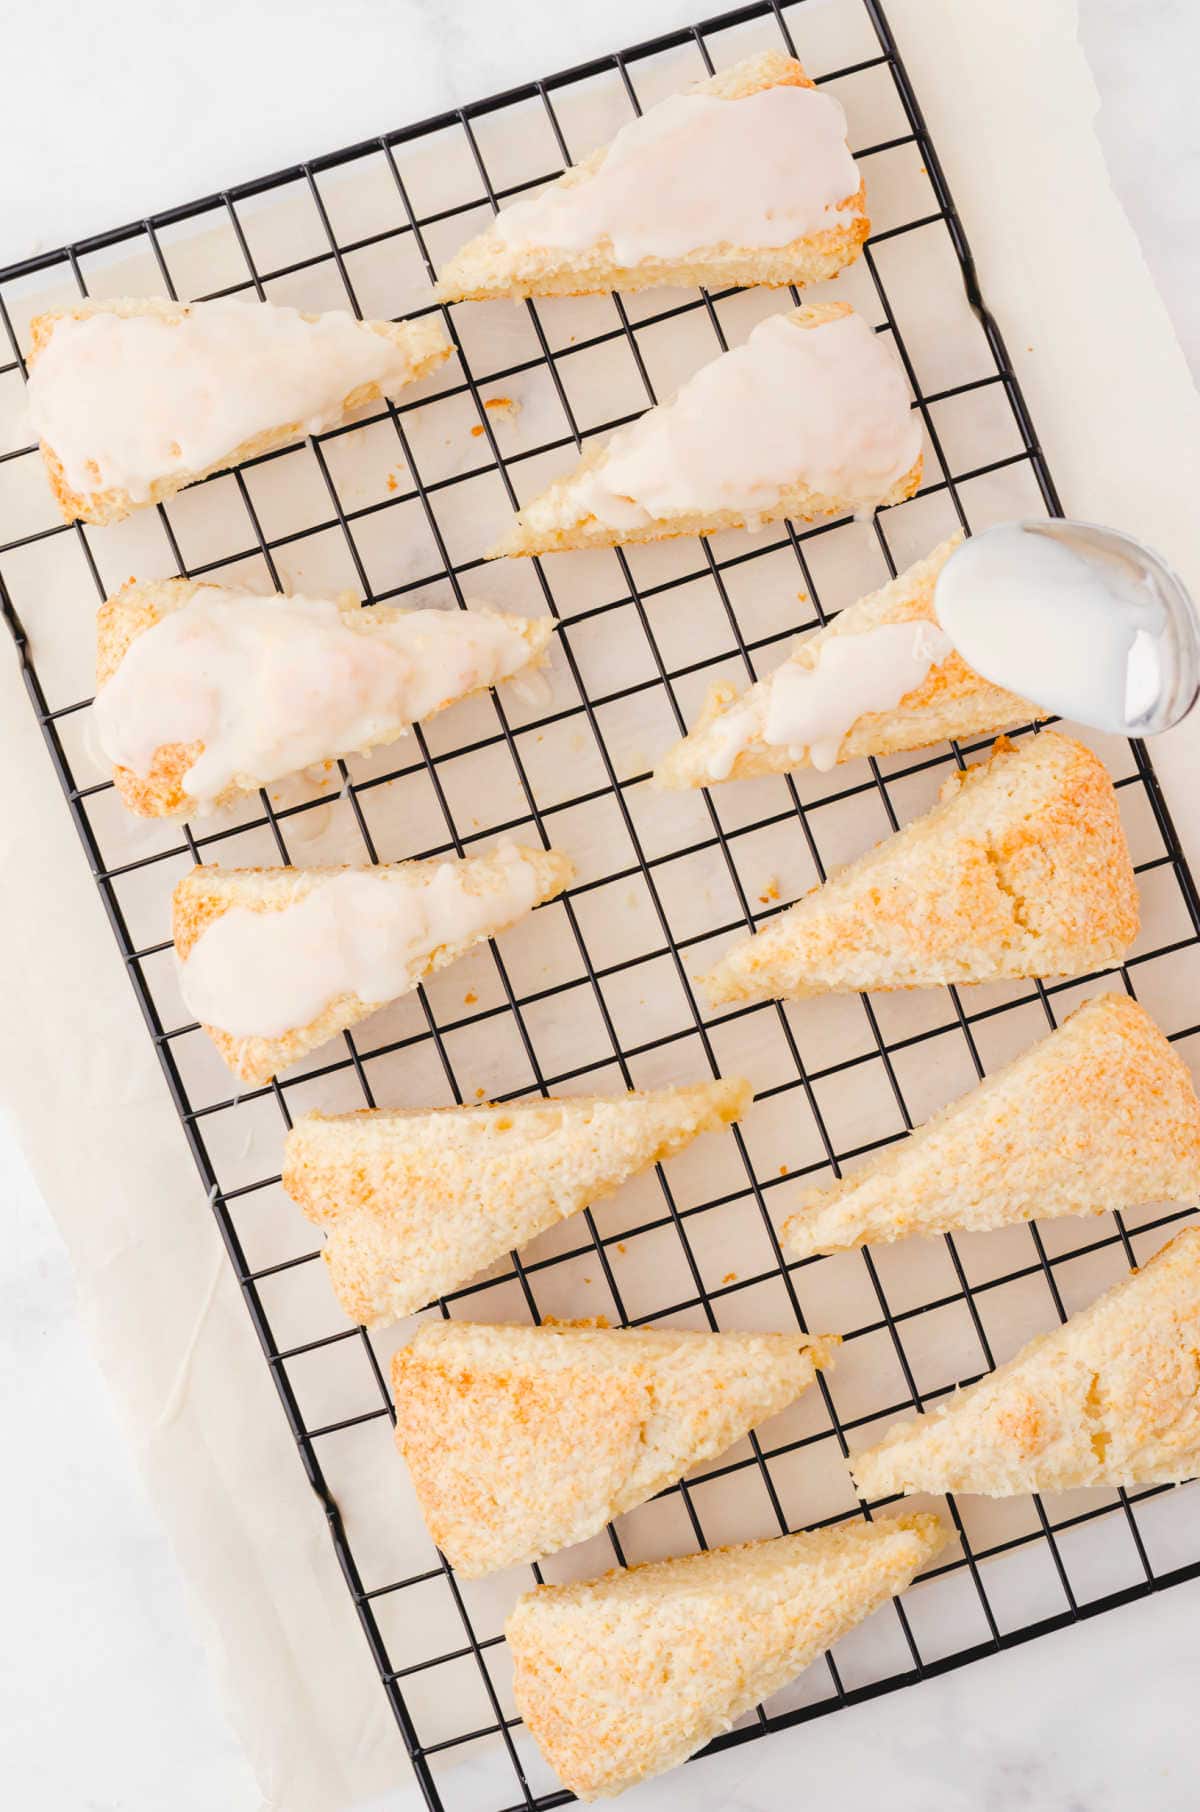
Separate scones and place on a cooling rack over parchment paper to catch any mess from the glazing process.
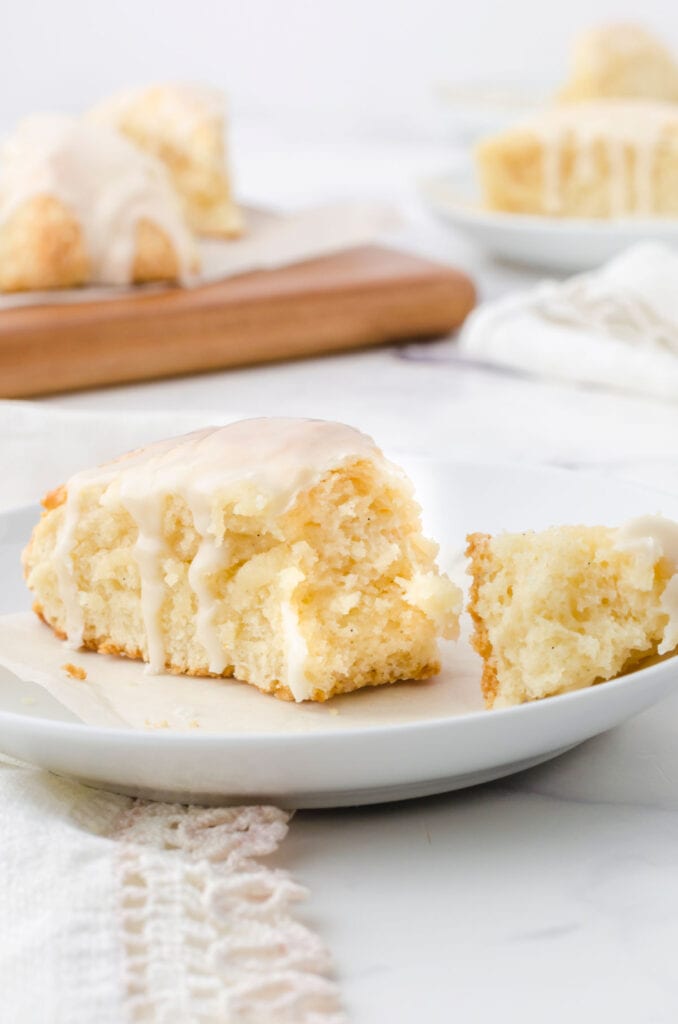
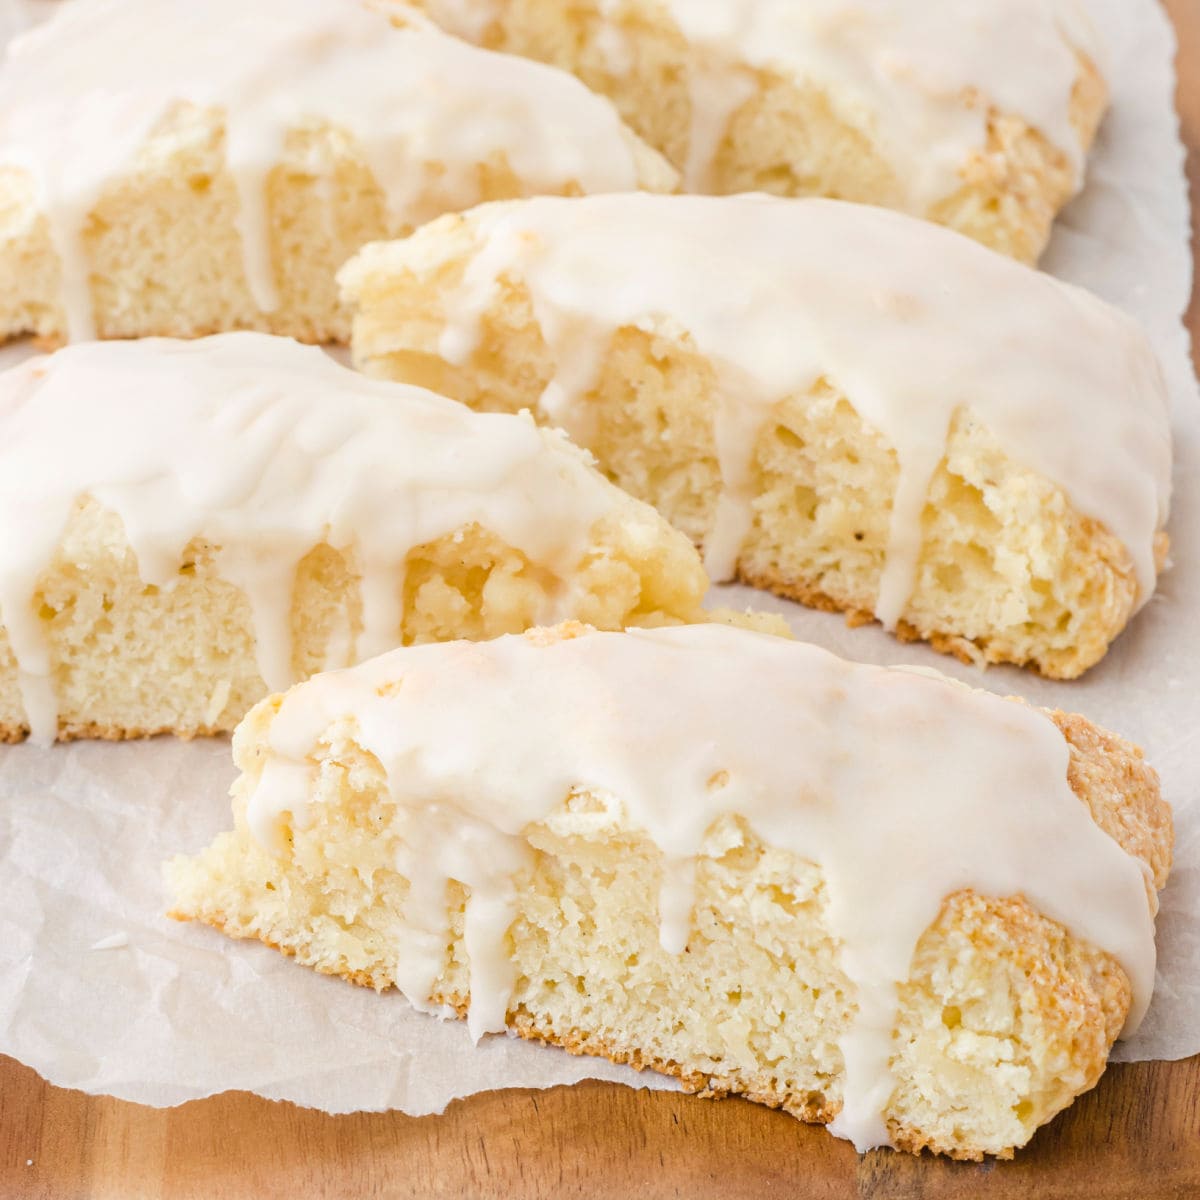
Spoon the sweet vanilla glaze generously over the warm scones and let cool a bit before serving. The glaze will crust over in a few minutes so they'll be a little less messy!
🥫 Storage
Sadly, fresh, homemade scones don't last very long. Cover with plastic wrap or keep in an airtight container at room temperature for a day or two - but they really are best the day they are made.
All those flaky layers!
You can freeze them for longer storage. They'll be find for up to 3 months. I like to flash freeze on a baking sheet then place in an airtight container with parchment between the layers.
📖 Variations
- Add some mini chocolate chips in with the flour.
- Use powdered sugar instead of the simple glaze.
- Add a half teaspoon of almond flavor.
- Chopped toffee is SO good in these!
💭 Tips
Expert Tip: Since I wrote this recipe I've started freezing the butter and grating it into the flour mixture with really excellent results. Try it!
- It's very VERY important that you use cold butter and keep everything chilled.
- Letting the scone dough sit for 20 minutes is important but if you live in Texas and it's August you'll want to let them sit in the fridge. They can handle 72 degrees or so but more than that and the butter gets too melty.
- If you brush the tops with heavy cream just before baking it gives them a nice sheen.
- You can make two smaller disks to copycat Starbucks Petite Vanilla Scones, if you like. If you do that this recipe will make 24. I prefer the larger scone.
- Some people prefer unsalted butter in this easy scone recipe.
- For even more vanilla flavor you can add a vanilla bean to granulated sugar in a pint jar and leave it for a few days. The sugar will take on the vanilla flavor and give you even more vanilla.
- You can use vanilla bean paste instead of the vanilla beans.
- If you'd like crusty edges use a pastry cutter to cut through the disk and place the wedges about 1 inch apart on the cookie sheet.
- Starbucks used to make mini scones. You can do the same by forming into a smaller disc shape and cutting them into smaller wedges (about half the size of these) and baking for 10 minutes.
- I love these easy vanilla scones for Mother's Day. I like to add a few pretty pastel sprinkles to the top of the scones.
👩🍳 FAQs
Always start with icy cold ingredients AND let them rest for 15 to 20 minutes before baking.
It's likely that you've overworked the dough. The more you re-roll and rework it the tougher it will get.
Homemade scones are best the day they are made.
📚 Related recipes
I love scones, y'all!
Try these lemon blueberry scones or these (starbuck's copycats) raspberry thumbprint scones, too! And definitely don't serve scones without some mock Devonshire cream.
Add these easy, make ahead egg bites to the meal for some protein.
🍽️ Serve with...
- This sweet- tangy strawberry cream cheese is so good with these!
- Strawberry butter is another possibility.
- Devonshire cream is hard to get in the US but you can make a delicious Devonshire cream substitute with this recipe.
🥄 Restless Chipotle recommends
The following are affiliate links. We are a participant in the Amazon Services LLC Associates Program, an affiliate advertising program designed to provide a means for us to earn fees by linking to Amazon.com and affiliated sites.
You'll need the following items-
- large bowl
- pastry blender
- baking sheet
- parchment paper
- all-purpose flour
- baking powder
- granulated sugar
- butter
- vanilla extract
- baking soda
- powdered sugar
- heavy whipping cream
- sour cream
- large eggs
- real vanilla beans or vanilla bean paste
📞 The last word
Be sure to give my copycat Starbucks vanilla bean scones a try... and serve them with this easy clotted cream substitute. SO good!
If you click on the number of servings in the recipe card you can adjust the measurements up or down for the exact number of servings you need. Don't forget that you can click on "add to collection" to save it to your own, private recipe box!
If you love this recipe please give it 5 stars! ⭐️⭐️⭐️⭐️⭐️
📖 Recipe
Vanilla Scones
Print Pin Recipe Rate RecipeIngredients
- 2 cups all-purpose flour
- 2 teaspoons baking powder
- ½ teaspoon baking soda
- ½ teaspoon salt
- ½ cup sugar, or vanilla sugar
- 5 tablespoons butter, icy cold
- 1 cup sour cream, full fat
- 1 large egg yolk
- 2 teaspoons vanilla extract
- ½ vanilla bean , carefully cut in half and scrape the seeds out
- 1 ½ cups powdered sugar
- 1 teaspoon vanilla extract
- 2 tablespoons heavy cream, more if needed - enough to make a glaze
Instructions
- Mix the all-purpose flour, salt, baking powder, baking soda, and sugar.
- Cut the butter into smaller bits and rub the ice cold pieces of butter into the dry ingredients or use a pastry blender - it will look a bit like coarse meal and be crumbly.
- In a separate bowl, whisk together the sour cream, egg yolk and vanilla extract until blended.
- Cut the vanilla bean in half and scrape the seeds from the half into the egg mixture. Whisk smooth.
- Add to the flour mixture and stir with a fork until dough forms a ball. Dough will be sticky.
- Place the dough onto a silpat lined baking sheet and pat into a disk about 1-inch thick.
- Cut the dough into wedges with a sharp knife but do not separate the wedges.
- Sprinkle top with sugar and let the vanilla bean scones stand twenty minutes at room temperature. This helps the gluten relax.
- Bake for 15 minutes at 400°F or until golden brown.
Glaze
- Mix the powdered sugar, 1 teaspoon vanilla extract, and cream until it is a thick glaze.
- Scrape the other half of the vanilla bean seeds into the glaze if more vanilla flavor is desired. Mix well.
- Spoon over warm scones.
Notes
- Since I wrote this recipe I've started freezing the butter are grating it into the flour mixture with really excellent results. Try it!
- Letting the scones sit for 20 minutes is important but if you live in Texas and it's August you'll want to let them sit in the fridge. They can handle 72 degrees or so but more than that and the butter gets too melty.
- If you brush the tops with heavy cream just before baking it gives them a nice sheen.
- You can make two smaller disks to copycat the Starbucks Petite Vanilla Scones, if you like. If you do that this recipe will make 24. I prefer the larger scone.
- Some people prefer unsalted butter in this recipe.
- For even more vanilla flavor you can add a vanilla bean to granulated sugar in a pint jar and leave it for a few days. The sugar will take on the vanilla flavor and give you even more vanilla.
- You can use vanilla bean paste instead of the vanilla beans.
Nutrition Facts
Nutrition information is estimated as a courtesy. If using for medical purposes, please verify information using your own nutritional calculator. Percent Daily Values are based on a 2000 calorie diet.
This recipe has been tested several times. If you choose to use other ingredients, or change the technique in some way, the results may not be the same.
Love this recipe?
Subscribe to the free membership group and never miss another recipe!
✍🏻 A note from Marye...
When I started working on these I don't even know what I was thinking. I really, really loved Starbuck's petite vanilla bean scones but I hardly ever got out of the house to go get them.
And then they discontinued them.
So I played around and played around until I came up with this recipe and ... let me tell you... it's a winner.
The best recipe ever.
I like them SO much better than the Starbucks ones.
There's just something so darn civilized about sitting down in the afternoon with a cup of tea (Earl Grey, please) or coffee and a scone. That margin of time that we can give ourselves to just be.
Originally published July 30, 2010. Last updated March 9, 2023 for editorial and image changes.

Beth says
Yes, your recipe and the techniques you make sure we know do assure that they turn out better than Starbucks. Thanks!
Katina says
I love your webite and have experimented with many different one. I am however diabetic. Have you ever tried any recipes using a sugar substitute and low carb flour? I would love to see you post recipes for diabetics. Believe it or not, there are a lot of us out here. I will continue to peruse your site and experiment with it. I miss my treats and make them for my family.
Marye says
Katina - I used to have a low carb site but I sold it. I just don't work with many low sugar/low carb recipes any more - the few I have are here -https://www.restlesschipotle.com/category/low-carb/