
Learn how to make homemade bread from scratch with this beginner-friendly guide. Step-by-step photos, yeast tips, and an easy recipe help you bake soft homemade bread with confidence.
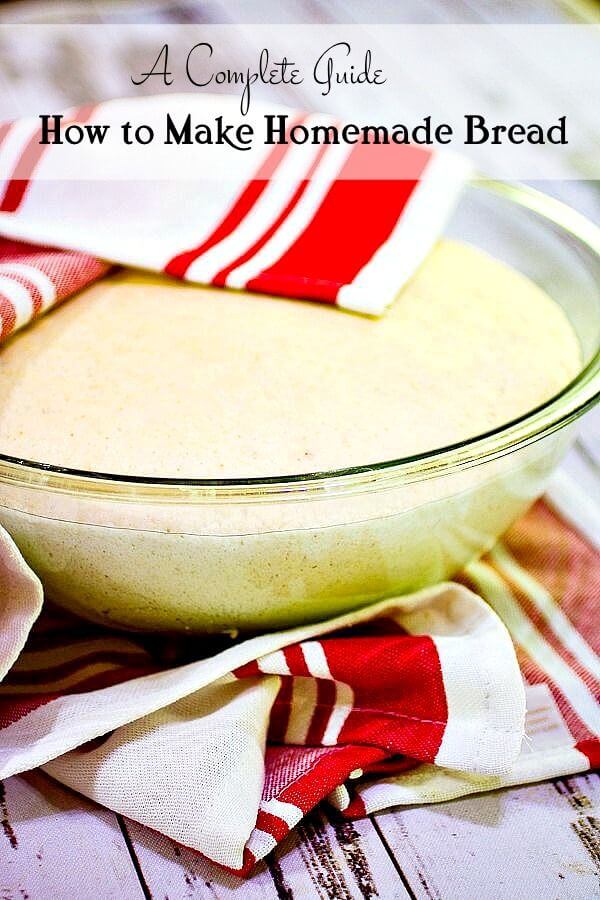
Table of Contents
- 📖 Recipe
- Basic ingredients for bread
- Yeast
- Flour
- Mixing bread dough
- Kneading
- Letting bread dough rest
- First rise
- Has the dough doubled?
- Punching down
- Second rise
- How to shape bread dough
- How to get the perfect bread crust
- Baking homemade bread
- Adding ingredients to bread dough
- How to store homemade bread
- Having trouble?
- Bread baking tips for beginners
- Bit by the bread bug?
- 💬 Comments
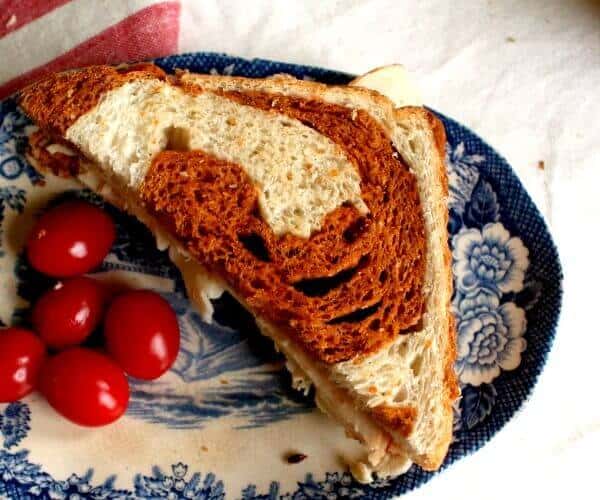
The idea of baking a puffy, golden loaf of bread can be scary but once you've gone through this guide you'll know how to make homemade bread like an expert!
📖 Recipe

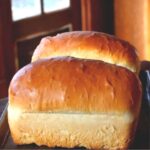
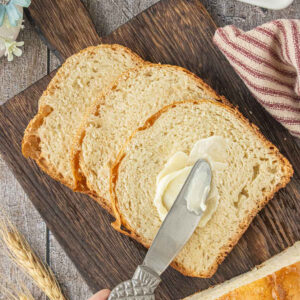
Basic Homemade Bread
Print Pin Recipe Rate RecipeIngredients
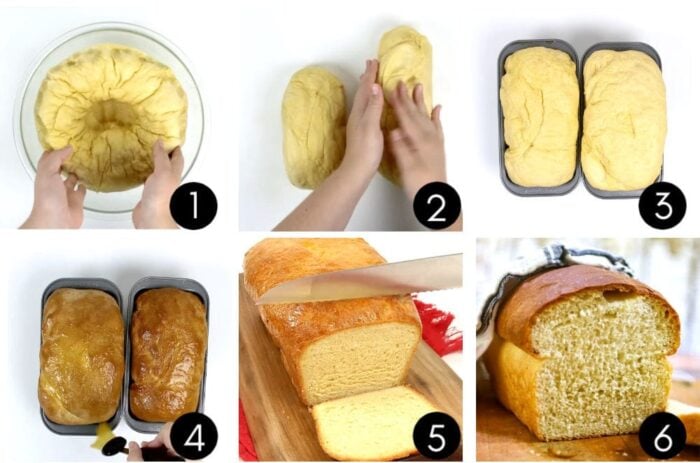
Instructions
- In a large bowl, dissolve yeast and 1 teaspoon of the sugar in the warm water.
- Let stand until the surface gets foamy and bubbly - about 10 minutes.
- Whisk together remaining sugar, salt, and 3 cups of the flour.
- Stir cooled butter into yeast mixture then pour into flour mixture.
- Beat until smooth.
- Stir in enough remaining flour, a little at a time, to form a soft dough.
- Turn onto a floured surface; knead until smooth and elastic, 8-10 minutes. (see video)
- Place in a greased bowl, turning once to grease the top.
- Cover and let rise in a warm place until doubled, 1-½ to 2 hours. (see image)
- Punch dough down.
- Turn onto a lightly floured surface; divide dough in half.
- Shape each into a loaf. (see section on shaping)
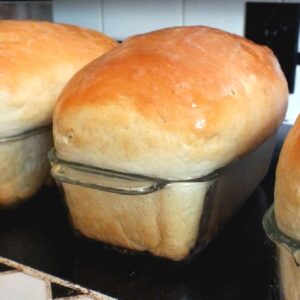
- Place in 2 greased 9x5-in. loaf pans.
- Cover and let rise until doubled, 1 to 1-½ hours.
- Bake at 375° for 30 minutes or until golden brown. Bread will sound hollow when tapped.
- Remove from oven, place pans on their sides, and cover with a tea towel for soft crusts.
- After 5 minutes remove from the pans and allow to cool before slicing.=
Notes
- Use a glass bowl and mark the glass evenly with the top of the dough with a marker. You'll be able to look at it and tell when it's double
- Poke your finger gently into the dough to your first knuckle. If it feels elastic or pushes back against your finger give it a few more minutes. If the dent stays without filling in you can safely assume that it has doubled.
- Due to the rising process the bowl will feel lighter than before.
- Once it's doubled you'll follow instructions about punching it down and further rising times.
- Store in a plastic bag or covered container for up to 2 days.
- For longer storage wrap tightly and freeze. I like to slice bread and put parchment or waxed paper between the slices before freezing so I can just take as many as I need without thawing the whole loaf. Bread is fine in the freezer for up to 3 months.
Nutrition Facts
Nutrition information is estimated as a courtesy. If using for medical purposes, please verify information using your own nutritional calculator. Percent Daily Values are based on a 2000 calorie diet.
This recipe has been tested several times. If you choose to use other ingredients, or change the technique in some way, the results may not be the same.
Love this recipe?
Subscribe to the free membership group and never miss another recipe!
Basic ingredients for bread
Most bread recipes use five basic ingredients:
- Flour → gives the bread structure
- Yeast → makes it rise
- Warm water or milk (105F to 110F) → wakes up the yeast
- Salt → adds flavor
- Sugar or honey → helps feed the yeast and adds a little tenderness
That's it. Nothing fancy. No culinary degree required.
Most beginner breads use water, though milk or buttermilk make a softer loaf. Some recipes even use tomato juice, potato water, beer, or chicken broth for extra flavor.
Basic homemade bread formula
Here's the basic homemade bread formula:
6 cups flour + 2 cups liquid + 1 tablespoon active dry yeast = 2 loaves of bread
And here's the part that throws beginners: bread dough isn't exact.
Some days you'll need a little more flour. Some days you'll need a splash more liquid. Humidity, temperature, and even the mood of your kitchen seem to have opinions.
Don't panic.
Bread dough should feel soft, smooth, and slightly tacky, not sticky enough to glue itself to your soul.
Yeast
If homemade bread feels intimidating, it's usually because of the yeast. I get it. Tiny living organisms deciding whether dinner succeeds feels a little unfair.
The good news? Yeast is easier than people make it sound.
There are two basic types used in homemade bread:
Commercial yeast
This is the kind most beginners use and the type you'll find in grocery stores. It comes in packets, jars, or bulk bags if you bake bread often.
For beginners, I recommend active dry yeast because it gives you a chance to make sure it's alive before you start mixing dough.
To test it, stir the yeast into ¼ cup warm water (105F to 110F) with a pinch of sugar. Let it sit for 5 to 10 minutes.
If it turns foamy and bubbly, you're good to go.
If nothing happens? Your yeast has quietly retired and it's time for a fresh jar.
This step is called proofing the yeast, and it helps make sure your bread rises properly.
New to yeast? Learn more about the differences between bread machine yeast and regular yeast → Bread Machine Yeast vs Regular Yeast
Instant or rapid-rise yeast
Rapid rise yeast (sometimes called instant yeast) works faster and can usually be mixed right into your dry ingredients.
- Requires less rising time
- No proofing step needed
- Works especially well in bread machines
I usually suggest beginners start with active dry yeast until you get comfortable making bread. Once you've baked a few loaves, experiment with rapid rise yeast.
Homemade sourdough starter
Some breads use a homemade starter instead of commercial yeast. It takes more patience, but once you get the hang of it, it becomes part baking project, part kitchen pet.
Want to try sourdough? → Homemade Sourdough Starter
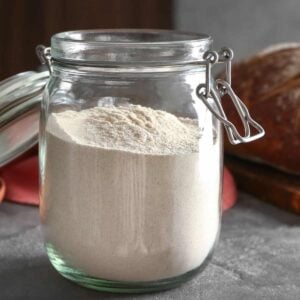
Flour
Walking down the flour aisle can feel oddly stressful for something that's basically powdered wheat.
For homemade bread, you really only need to know about two types:
Bread flour
If you want tall, soft loaves with great texture, bread flour is your best choice.
It has a higher protein content, which helps create more gluten and gives bread that chewy, bakery-style texture.
All-purpose flour
No bread flour? No problem.
All-purpose flour works just fine for homemade bread, especially if you're a beginner. Your loaf may not rise quite as high, but it will still be delicious and much easier to work with while you're learning.
Whole wheat flour
Whole wheat flour adds a hearty flavor but can make bread heavier and denser.
If you're just starting out, try replacing only half the white flour with whole wheat flour until you get comfortable working with yeast dough.
One flour to skip
Cake flour isn't made for bread and usually won't give you the structure you need for a good loaf.
Want help choosing the right flour? 26 Different Types of Flour and How to Use Them
Mixing bread dough
Making bread dough is really just combining ingredients until you end up with a soft, kneadable dough.
At first, it may look messy. That's normal.
Most yeast breads start out looking sticky, shaggy, and slightly questionable before they suddenly begin acting like actual bread dough.
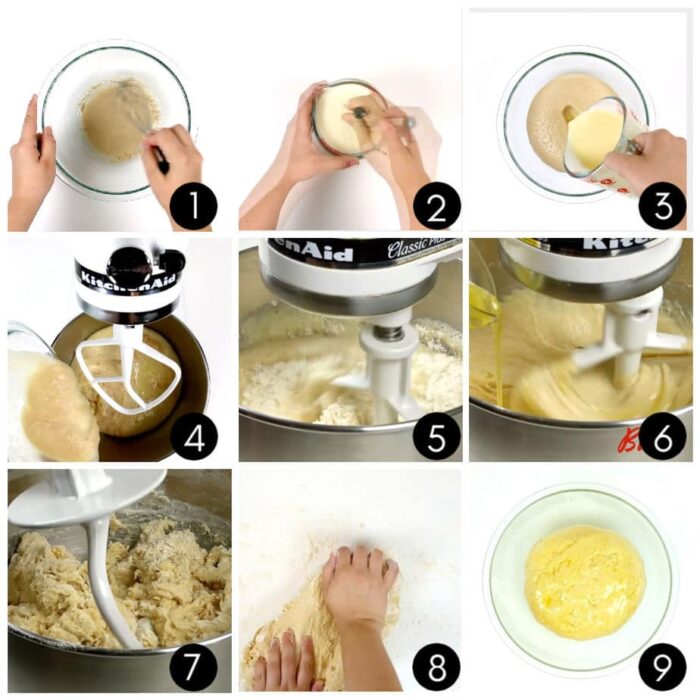
Here's the basic process:
1. Wake up the yeast
Mix the yeast with warm water (105F to 110F) and a pinch of sugar. Let it sit until foamy.
2. Add liquids and dry ingredients
Mix in the remaining liquid, sugar, salt, butter or oil, and part of the flour.
3. Add flour gradually
Keep adding flour a little at a time until the dough starts pulling away from the sides of the bowl. Don't dump all the flour in at once. Bread dough has opinions, and humidity can change how much flour you need.
Once the dough comes together, it's time for the next step: kneading.
Making batter bread like English muffin bread? Some breads stay much softer and are mixed differently, so always follow the individual recipe instructions.
Kneading
Kneading bread by hand is easier than it sounds, but it can feel awkward the first time.
Don't worry. You're not trying to wrestle the dough into submission.
You're just helping the gluten develop so your bread has structure and rises properly.
Watch me knead bread here:
By hand
If you are 5′ 5″ or under don't try to knead your bread on the counter. You will hurt your arms and back, plus you'll have to work too hard. Take your bread dough to the table, assuming it is lower.
Your kneading surface should allow your arms to hang with just a slight bend at the elbow when your hands are palm down on it. You may need to knead while standing on a step stool.
Lightly flour your surface, then:
- Push the dough away from you using the heel of your hand
- Fold it back toward the center
- Turn the dough a quarter turn
- Repeat
Keep going for about 8 to 10 minutes.
At first the dough may feel sticky or lumpy. That's normal. It smooths out as you work with it.
How do you know when it's kneaded enough?
The dough should feel smooth, soft, and elastic.
A quick test? Pinch your earlobe.
Weird, I know.
Properly kneaded dough feels surprisingly similar.
You can also try the windowpane test:
Pull off a small piece of dough and gently stretch it.
If it stretches thin enough to almost see light through it without tearing, you're good to go.
Using a stand mixer
Using a mixer makes kneading easier, especially for beginners.
- Use the dough hook attachment
- Mix on low speed while adding flour gradually
- Once the dough pulls away from the bowl, turn the speed up slightly
- Knead for about 5 minutes
Then check it using the earlobe or windowpane test.
Just don't over-knead. Dough can absolutely become overworked.
Once your dough feels soft and elastic, it's time to let it rest and rise.
Letting bread dough rest
Sometimes bread dough needs to rest for 10 to 15 minutes after kneading or punching it down.
This short break relaxes the gluten so the dough is easier to shape, roll, or stretch without fighting you the whole time.
You'll see this step in recipes for things like pizza dough, rolls, and baguettes.
If your recipe says "let rest," don't skip it. Dough can get surprisingly stubborn.
First rise
Most homemade bread recipes rise twice, though some only rise once.
After kneading:
- Shape the dough into a ball
- Place it in a lightly oiled bowl
- Turn it once so the top gets lightly coated with oil
This step matters more than people think.
The oil helps keep the dough from drying out while it rises. A dry crust on top makes it harder for the dough to expand.
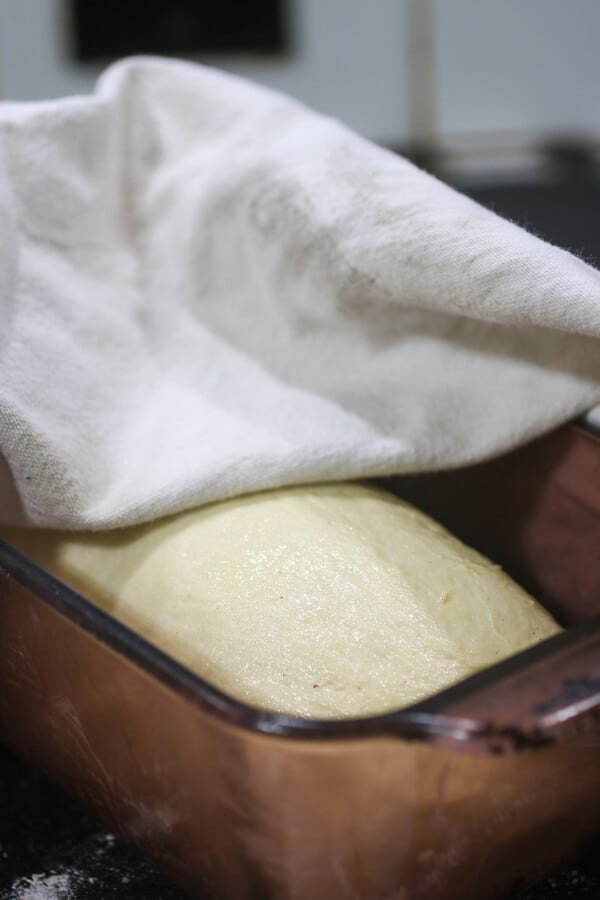
Cover the bowl with a barely damp tea towel or plastic wrap and place it in a warm spot.
A good rising temperature is around 75F to 85F, though cooler kitchens simply mean a slower rise.
Most dough takes 1½ to 2 hours, or until doubled in size.
Good places to let dough rise
- Oven with the light on
- Oven with a bowl of hot water nearby
- Warm kitchen counter
- Top of the refrigerator
- Heating pad on low (check temperature first)
Cool kitchen? Don't panic.
Bread rises slower in cooler temperatures. Warm kitchens speed things up.
And fun little bread mystery: rainy days often make especially beautiful loaves.
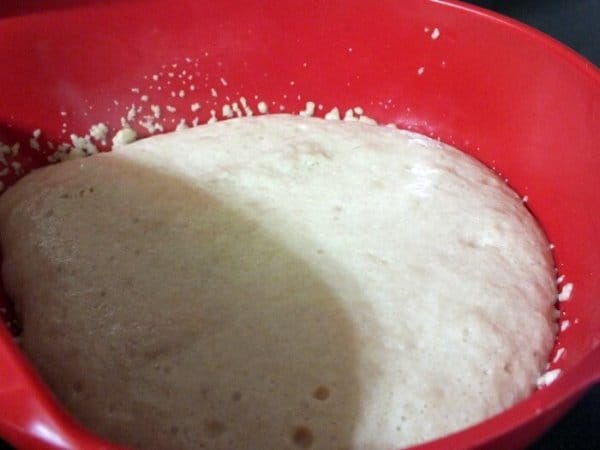
Has the dough doubled?
Most bread recipes say to let dough rise until doubled.
That simply means the dough should look about twice as large as when you started.
Some recipes call for a 1½ rise, which just means the dough has increased by about half its original size rather than fully doubling.
Not sure if it's ready? Here are a few easy ways to tell:
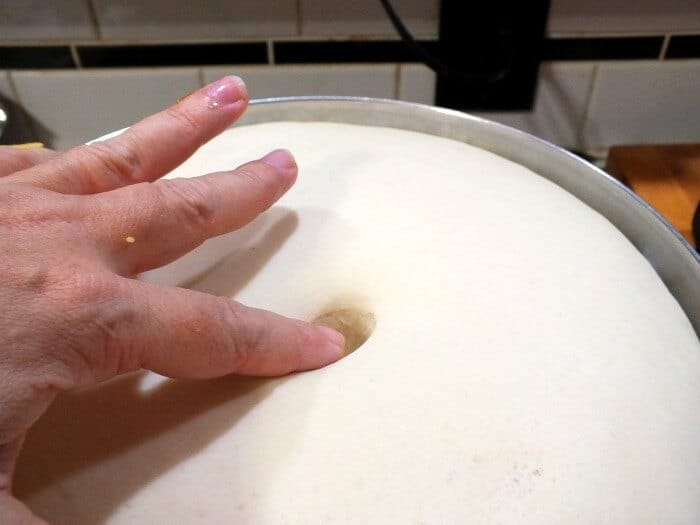
The poke test
Gently press your finger into the dough about to the first knuckle.
- If the dough springs back quickly, let it rise a little longer
- If the dent stays or slowly fills in, it's ready
The glass bowl trick
Use a glass bowl and mark the starting height with a dry erase marker or rubber band. It's an easy visual way to tell when the dough has doubled.
Trust your eyes
With practice, you'll start recognizing risen dough pretty quickly. It should look puffy, lighter, and full of air.
Once the dough has risen, it's time to punch it down and move on to the second rise.
Want taller, fluffier bread? → Read my guide to helping bread rise higher
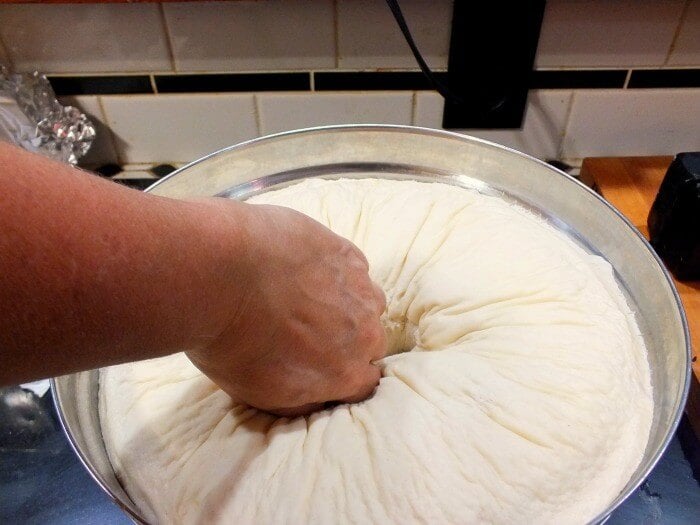
Punching down
After the bread has risen the first time you will punch it down.
Basically you push your fist into the dough and gently knead it a few times to deflate it. This takes the big air pockets out so it's especially important in sandwich bread.
After the first rise
If you aren't letting it rise two or three times (and many times you won't) you'll skip to the shaping now.
Second rise
After shaping the dough, most bread recipes call for a second rise.
The good news?
This one usually goes much faster.
Because the yeast has already been hard at work during the first rise, the dough often doubles again in 30 to 45 minutes.
The second rise helps create a softer texture with a finer crumb, which is what gives homemade sandwich bread that lovely even texture.
If your kitchen runs cool, it may take a little longer. Bread likes patience more than panic.
This is also an excellent time to clean the flour explosion off your counter and wonder how it somehow got behind the coffee maker.
How to shape bread dough
- When it's risen punch it down.
- Separate and shape into loaves.
- Place in greased pans.
- Bake.
- Let cool and slice.
- Cover with a tea towel during cooling to keep the crust soft.
Once the dough has finished its first rise, gently punch it down to remove the large air bubbles.
If you're making two loaves, divide the dough evenly.
For a basic sandwich loaf:
Option 1: Roll-and-tuck method
This gives the neatest shape.
- Pat the dough into a rectangle about as wide as your loaf pan
- Roll it up tightly like a jelly roll
- Pinch the seam closed
- Tuck the ends underneath
Option 2: Shape by hand
For a more rustic loaf, gently shape the dough with your hands and tuck the ends underneath.
Place the dough into a greased 8x4-inch or 9x5-inch loaf pan.
Cover loosely with a tea towel and let rise again until the dough just peeks above the edge of the pan and looks puffy. This usually takes 30 minutes to 1 hour.
Then it's time to bake.
Want to make braided or artisan-shaped bread?
Once you get comfortable with basic loaves, you can experiment with braids, baguettes, rounds, and specialty shapes like this Viennese Christmas Loaf which uses a double braiding technique.

How to get the perfect bread crust
Everyone has strong feelings about bread crust.
Some people want soft sandwich bread. Some want bakery-style crunch. Luckily, you can control a lot of that at home.
Brush one of these on the loaf just before baking to get the crust you want:
| For this kind of crust | Brush on |
|---|---|
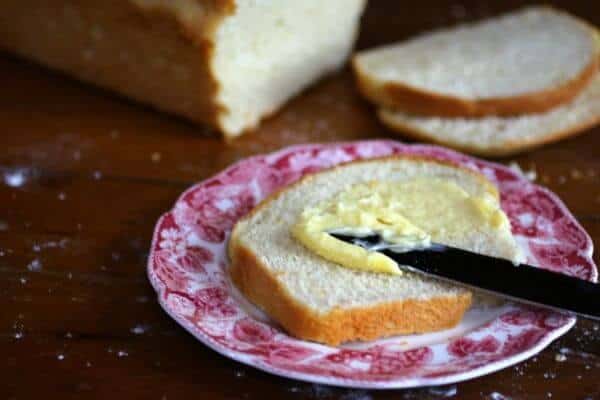
| Soft and buttery | Melted butter before and after baking |
| Shiny and golden | 1 whole egg + 1 tablespoon water |
| Light and slightly crisp | Egg white + 1½ teaspoons water |
| Rich golden color | Egg yolk + 2 teaspoons water |
| Soft and darker brown | Milk |
| Crispier crust | Water |
Extra tricks for the crust you want
For a softer crust:
Cover the warm loaf loosely with a clean tea towel while it cools.
For a crispier crust:
Turn the oven off and leave the loaf inside for about 10 minutes after baking.
For classic sandwich bread? I usually go with butter and a tea towel because soft bread is hard to beat.
Baking homemade bread
Most homemade bread bakes in a regular oven.
Bake according to your recipe instructions, usually around 350F to 375F, until the loaf is golden brown.
How do you know when bread is done?
Here are three easy ways to tell:
The hollow sound test
Carefully tap the top or bottom of the loaf. If it sounds hollow, it's usually done.
The color test
The crust should be golden brown and firm, not pale or doughy-looking.
The thermometer test (most reliable)
An instant-read thermometer inserted into the center of the loaf should read about 200F.
What if the bread is browning too fast?
No worries.
Loosely tent the top with aluminum foil to keep it from getting too dark while the center finishes baking.
Once baked, remove the bread from the pan after about 5 minutes and let it cool on a rack.
For a softer crust, cover it loosely with a clean tea towel while it cools.
Then comes the hardest part:
Waiting for it to cool enough to slice.
Adding ingredients to bread dough
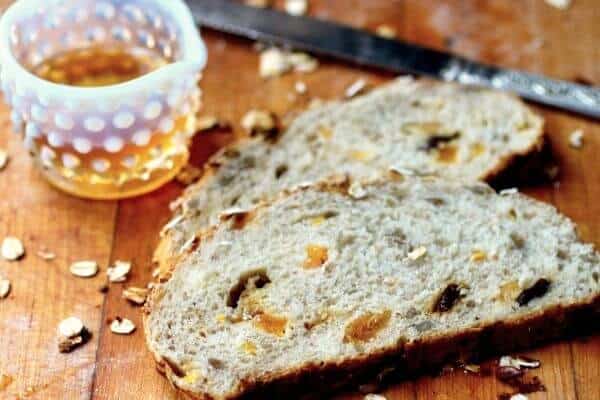
Once you're comfortable making basic bread, it's easy to add things like:
- raisins or dried cranberries
- nuts
- shredded cheese
- herbs
- cinnamon and sugar
To mix them in:
- Sprinkle part of the ingredients onto the dough
- Knead a little
- Add more and repeat until evenly mixed
Keep in mind that dried fruit adds moisture, so you may need a little less liquid in the dough.
My advice? Learn basic bread first. Then start getting adventurous.
That's when the kitchen starts smelling downright magical.
How to store homemade bread
Homemade bread doesn't have preservatives, so it won't stay soft for a week like grocery store bread.
Store cooled bread in a plastic bag or airtight container for up to 2 days at room temperature.
For longer storage, freeze it.
I like to slice the loaf first and place parchment or wax paper between slices so I can grab exactly what I need without thawing the whole loaf.
Homemade bread freezes beautifully for up to 3 months.
Having trouble?
If your loaf came out dense, didn't rise, or looks like it had a difficult emotional week, don't panic.
Bread has a learning curve, and even experienced bakers occasionally end up with a loaf that humbles them.
Need help figuring out what went wrong? → Read my Bread Troubleshooting Guide
Bread baking tips for beginners
A few things I wish every beginner knew:
- Bread dough changes with humidity and weather
- Don't rush rising time
- Slightly sticky dough is usually better than dry dough
- Your first loaf does not have to be pretty to taste amazing
- Practice matters more than perfection
The truth?
Bread baking gets easier every single time you do it.
Soon you'll stop second-guessing yourself and start casually saying things like:
"This dough just needs a few more minutes." Like some kind of flour-covered kitchen oracle.
Want more help? → Bread Baking Tips or Bread Baking FAQs
And now? It's time to bake your first loaf.
Bit by the bread bug?
If one homemade loaf turned into "well now I need to bake everything with yeast," welcome to the club.
My bread book walks you through beginner-friendly recipes, troubleshooting, tips, and enough cozy carb energy to make your kitchen smell like somebody's grandmother lives at your house.
Reader Reviews
- This cookbook is probably the best one on bread out! It is easy to follow and the results are phenomenal.
- Lots of handy tips and working my way through the book gave me bread making skills and knowledge I didn't have.
- I'm enjoying baking from this book. You'll learn the why's as well as the how-to's...

Kim says
Thank you for the best bread recipe! I love baking bread, while it loves hips !!!
Janice Jenkins says
Wow! So much great information! And I haven't even read e everything or followed all the links! I can't wait to put some of this in practice! Thanks so much!!
Livi says
This is one of the most wonderful trainings i had undergone.
Mrs Marym, you are truely a wonderful teacher and writer, love you n learnt alot from this.....kisses.
Marye says
Thank you!