
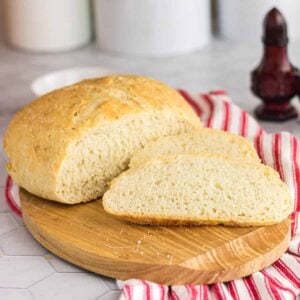
If you've ever wanted to make your own bread but felt a little intimidated, you're in the right place! I've been baking bread for over 50 years (yep!) and my breadmaking tips for beginners (and experienced bakers, too!) will guide you through the process, making it easy and fun.
No more intimidation factors to hold you back.
With a few simple techniques and a bit of patience, you'll be baking delicious homemade bread in no time. Whether you're a busy mom, a home cook looking to expand your skills, or just someone who loves the taste of fresh bread, these tips are perfect for you.
You'll get the benefit of my 5 decades of experience without having to make all the mistakes I did!
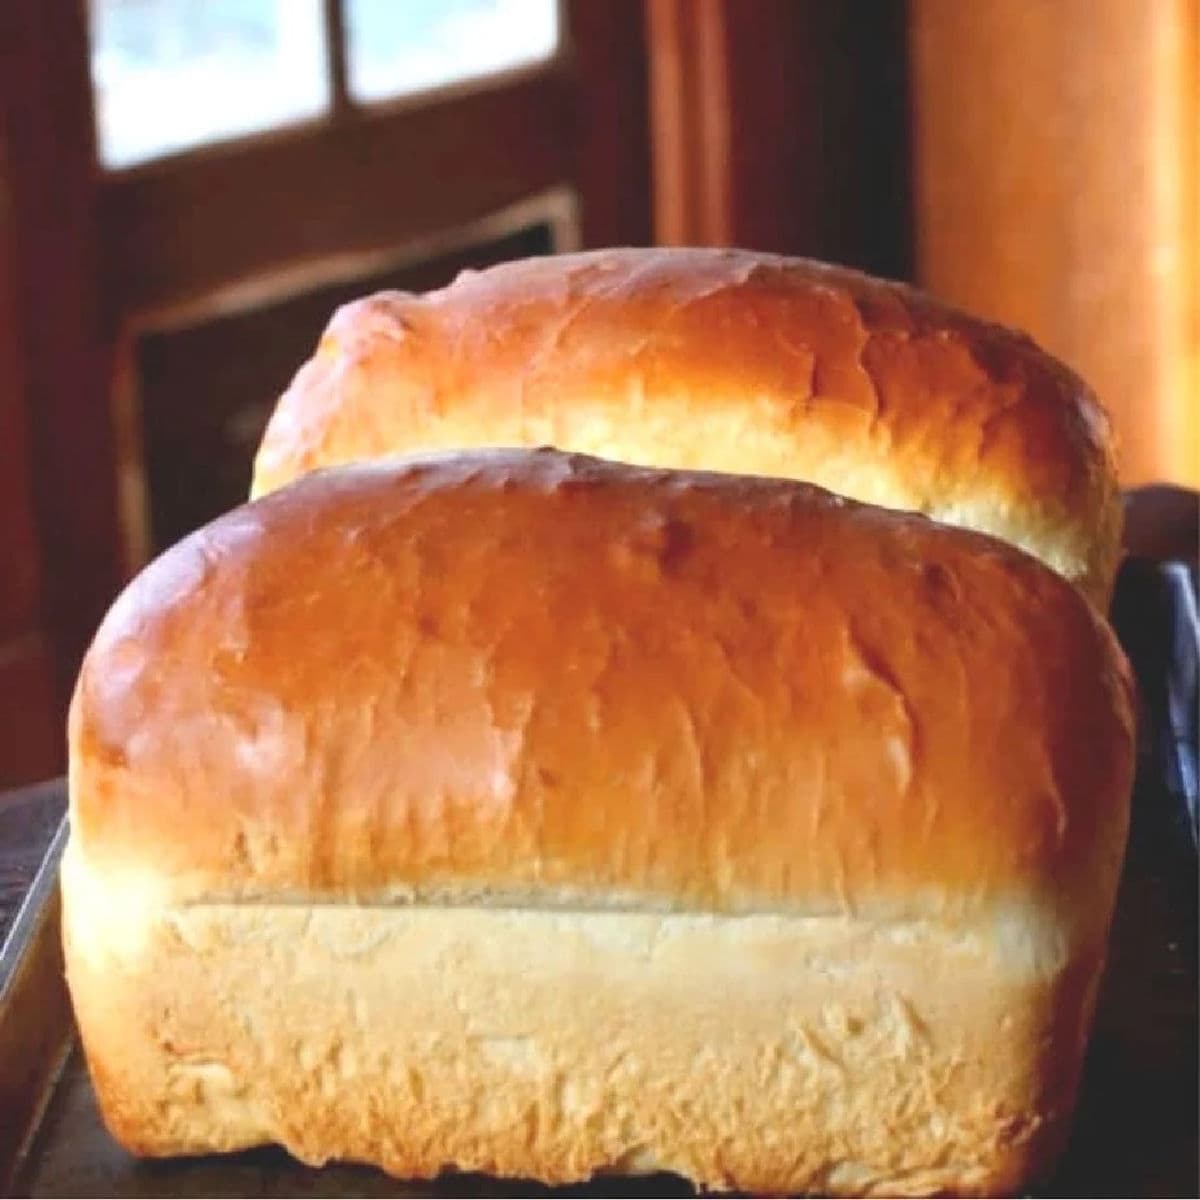
Table of Contents
- 🗝️ Key takeaways
- Pin for later
- 8 Things you need for yeast baking success
- A good bread recipe
- Marye's Tip o' the day
- Fresh active yeast
- Quality ingredients
- Sufficient Kneading
- Stop, review, and take a breath
- First Rise
- Punching Down
- Second Rising
- Punch It Down Again
- Run it to trouble? Let's figure it out!
- Final Shaping
- Final Rise
- The Crust
- Baking
- Cooling
- Storing
- 📚 Bread recipes to practice with
- 💬 Comments
🗝️ Key takeaways
- You need 8 things for a perfect loaf of bread but there are only 3 essential ingredients.
- Yeast dough needs to rise in a warm place.
- Most bread recipes have a 1:3 ratio of liquid to dry ingredients.
If you've ever tried to make yeast bread and failed you'll want to pin, bookmark, and save this post for easy reference.
I'm going to help you figure out why your bread isn't working out for you with these yeast bread baking tips.
A century ago, people learned to bake bread from their mothers and grandmothers. They watched, they helped, and by the time they were adults, they had soaked up all that bread-baking experience.
Learning to bake bread is harder in modern times but with a good recipe and some great tips you'll be on your way.
Don't lose this information!
Pin for later
8 Things you need for yeast baking success
There can be a variety of reasons why your bread doesn't bake up the way you expected it to. Yeast bread baking is one of those skills that takes a lot of practice because you can't give exact measurements.
Good bread depends on at least eight things:
- A good recipe
- Fresh, active yeast
- Quality ingredients, especially the right kind of flour.
- Sufficient kneading
- Long enough rising time in the proper temperature (but not too long)
- The right-sized pans
- Proper oven temperature
- Proper cooling and cutting
Let's take these things one at a time. As you can imagine, this is going to be a long post, so grab a snack before we get going.
A good bread recipe
Finding a good bread recipe isn't as easy as you might think. Most of us, who have been making bread for centuries, don't really take the time to measure ingredients. We go by feel, look, smell, and dark magic bestowed on us by the great bread-baking fairy.
So, when we go to write the recipe out we may over or under-estimate the exact measurements.
Basic bread has five ingredients and only the first three are really necessary -
- Flour
- Yeast
- Water
- Salt
- Sugar or other sweetener
Check to make sure your recipe has these. If it leaves out sugar, salt, or both you can leave it out, too.
Marye's Tip o' the day
If you like formulas then memorize the following -
Bread = 3 parts flour + 1 part liquid + 1 tablespoon of active, dry yeast for every 6 cups of flour.
Most basic yeast bread recipes are going to have around 6 cups of flour and 2 cups of water and they'll make two loaves.
The other part of that equation is this. Sometimes the dough will need a little more or a little less flour to be exactly right. There is no way to predict it.
That knowledge comes by experience. Those beautiful loaves that come out of my oven?
I have been baking bread since 1973. That's 51 years of experience. The first loaves I made where not quite so lovely!
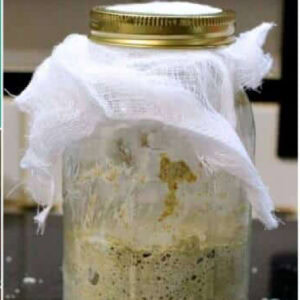
Fresh active yeast
The yeast should foam up like this when you "proof" it.
You can get yeast in packets or jars at the grocery store or you can get Active Dry Yeast in one or two pound bags online if you use it a lot.
It's tons cheaper to get the bigger bag and it will last six months or more in the fridge. Always let your yeast come to room temperature before you use it.
Some recipes call for the Rapid Rise yeast but I don't like it. When bread rises too fast it doesn't develop the same flavor and texture. You can use it interchangeably with active dry yeast, however. Not using it is a preference for me, not a law.
Proofing yeast
Always test your yeast, also called proofing, by putting it in the bowl and adding about ¼ cup of the 105F water. I always add a pinch of sugar and ginger, too. Stir it up and set it aside for a few minutes.
After 10 minutes or so you should see that it has bubbled up and is foamy. That means that it is working. You're good to go.
If it doesn't foam up then you'll need to get more yeast because yours is dead.
Quality ingredients
You know what I am going to say. The results of your recipe will only be as good as the ingredients you use.
Flour
All-purpose flour is fine for most breads, but you won't get the same rise and texture as you would have with bread flour.
All-purpose flour is much easier to work with for a novice bread baker because it does have less gluten than bread flour. That makes it easier to knead properly, especially if you are kneading by hand.
Water
If your water has a mineral taste to it consider using filtered water. Minerals in water can give bread an odd flavor but it can also kill off your yeast.
Your water should always be comfortably warm to the touch - shoot for about 105F to 110F, but don't worry because yeast can work as low as 95F or as high as 120F.
Salt
Kosher salt is the best. It is pure and you will get consistent results. All of my recipes are created with kosher salt, so if you use regular table salt, you'll need to cut the measurement back by about ¼.
Sweetener
You can use sugar, brown sugar, honey, agave, unsulfured molasses, corn syrup, or whatever. Just be aware that each will give the bread a slightly different flavor.
For example, I like to use heavily flavored buckwheat honey with whole grain breads because the flavor doesn't get lost. White bread is best with a lighter honey, like wildflower or orange blossom.
Do not use artificial sweeteners. They do not work the same.
Sufficient Kneading
There are two ways to knead bread. You can knead it in a mixer or by hand.
If you are only making bread once or twice a year then you probably don't need a mixer.
If you plan on making it a lot you'll need a good mixer like Kitchen Aid or better. I
If you plan on making whole grain breads a lot you'll want a Bosch. I have both a Kitchen Aid and a Bosch because I bake a lot of bread (and a lot of different kinds of bread).
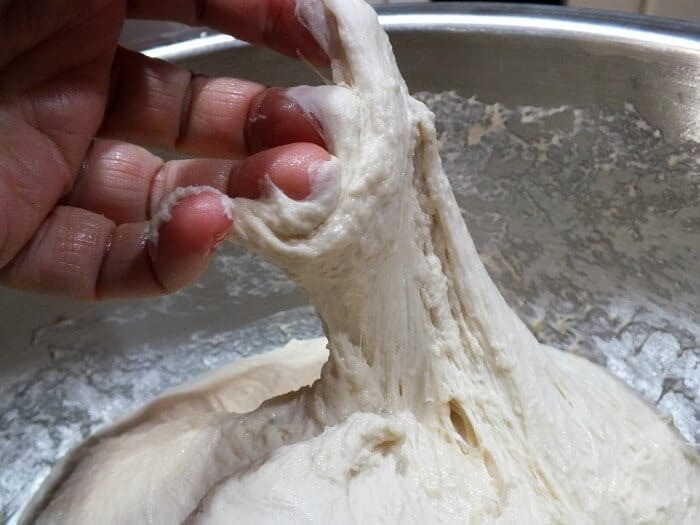
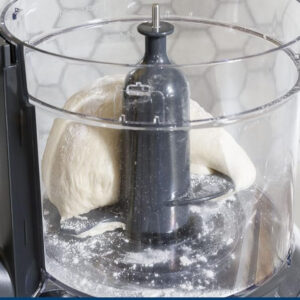
This yeast dough is stretchy and elastic but still much too sticky! it will need more flour and more kneading time.
By. hand
Learning to knead by hand is important. I recommend that you give it a try if you've never hand-kneaded bread.
I think hand kneading teaches you more about how the bread should look and feel than using a mixer. If you are kneading by hand, don't try to make anything but white bread, though!
Whole-grain breads can be hand-kneaded, but it takes time, practice, and muscles of steel.
If you are 5' 5" or under do not try to knead your bread on the counter. You will hurt your arms and back, plus you'll have to work too hard.
Take your bread dough to the table, assuming it is lower. Your kneading surface should allow your arms to hang with just a slight bend at the elbow when your hands are palm down on it.
- Sprinkle the surface of the table with a little flour to keep the dough from sticking.
- Starting from the middle, push the dough away from you with the palm of your hand.
- Fold the edge back to the middle and give the dough a quarter turn.
- Repeat the pushing and folding action for about 5 minutes.
- Now your arms are probably tired so clean up a little and then come back to the dough.
- Knead it another 5 minutes or so.
- When the dough is ready it will feel somewhat like your earlobe when you pinch it. When you gently pull on it the dough will stretch a little instead of breaking off.
This video will show you how to knead yeast dough.
If you are unsure if you have kneaded enough use the window pane test.
- Pull off a small piece of dough.
- Stretch it as much as you can.
- If it is kneaded correctly the dough will stretch very thin without tearing.
- You can also pinch a piece of the dough. It will feel like your earlobe when you pinch it if it's been kneaded enough.
By stand mixer
- Fit the mixer with the dough hooks.
- Mix in your ingredients as directed in your recipe using the lowest speed. It's best to add the flour ½ cup at a time and mix it in well before adding the next ½ cup.
- When there is enough flour in the dough it will pull away from the sides of the bowl leaving them clean.
- Turn the speed up one notch.
- Knead on this speed for 5 minutes.
- After 5 minutes you can do the earlobe test or the windowpane test but your dough should be right. Do not over knead your dough!
Stop, review, and take a breath
When it comes to bread baking, mixing and kneading are the hardest parts to get right. If those are done properly, everything else more or less falls into place.
At this point you've mixed the bread to the perfect balance of yeast to liquid to flour.
You've kneaded it thoroughly so that it feels like an earlobe when you pinch it and the dough kind of pulls back when you try to stretch it out. It's elastic.
You should be proud of yourself. In fact, go and make a quick cup of coffee because you are about to kick back and relax for a bit.
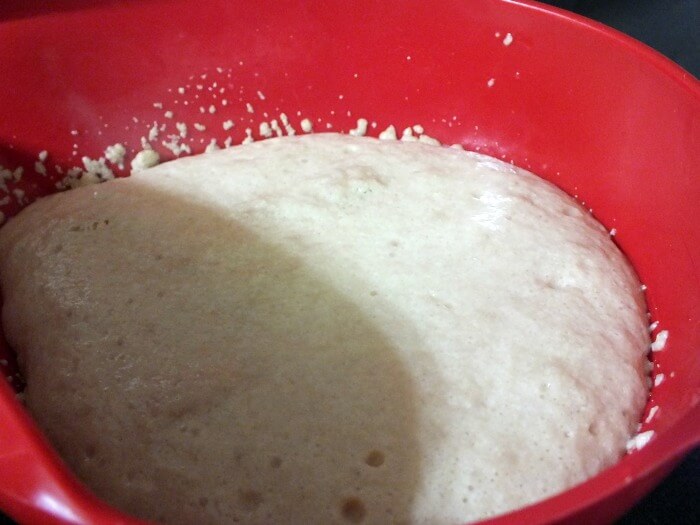
First Rise
First Rise
Some bread recipes only call for 1 rising, most call for 2, and some call for 3. I'll tell you a secret - if you let the dough rise at least twice it will have a much better texture than if you only let it rise once.
Form your kneaded dough into a round ball and oil it. Place it in a large oiled bowl. This will keep the dough from developing a dry crust - it's very important.
When the yeast produces the gas and the dough expands a crust will keep it from expanding. If it's kept soft it has the flexibility to puff up like a balloon.
Now, cover the bowl with a warm, barely damp tea towel.
Put the bowl in a warm (75-85F is good but my warming oven is 105F) spot for 1 ½ to 2 hours - or until the dough doubles in size (more about that later).
Where to let the dough rise
Good places to let dough rise are:
- On the counter in the summer
- In the oven with the light on.
- On top of the refrigerator.
- On top of the water heater.
If your kitchen is cooler you'll need to give it a longer time to rise.
Barometric pressure can make a difference
When the barometric pressure is low, like on a rainy day, your bread will rise higher and lighter than when it is clear and sunny. Scientifically speaking it's because the air is lighter on stormy days than on clear days so the dough doesn't have as much weight holding it down.
Now, once you have your dough all squared away and rising nicely you should grab that cup of coffee and relax.
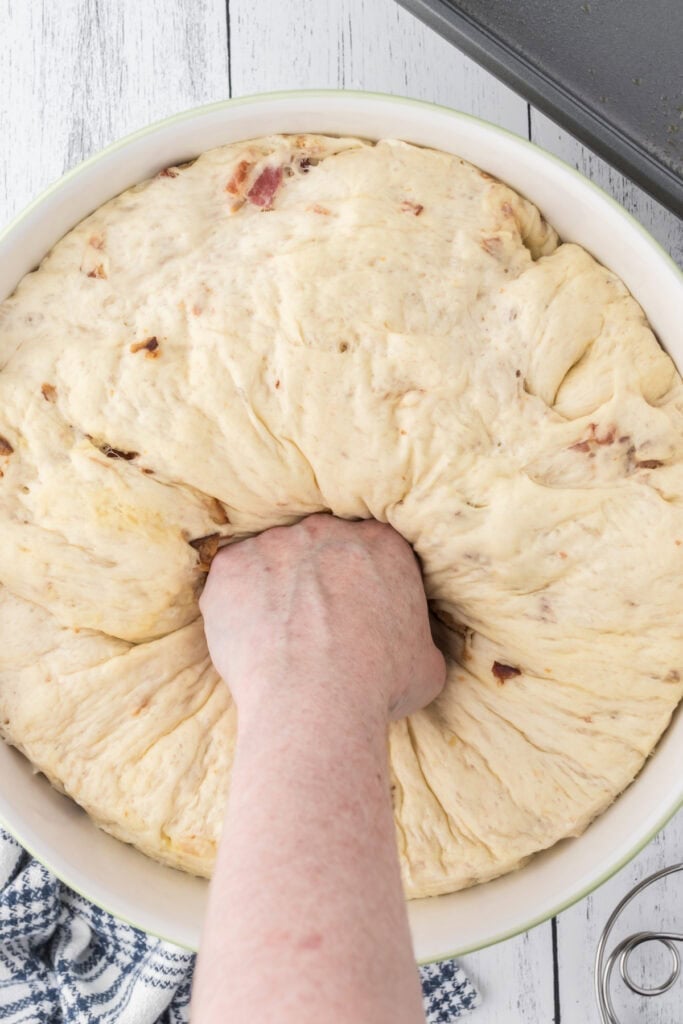
Punching Down
This may be my favorite part.
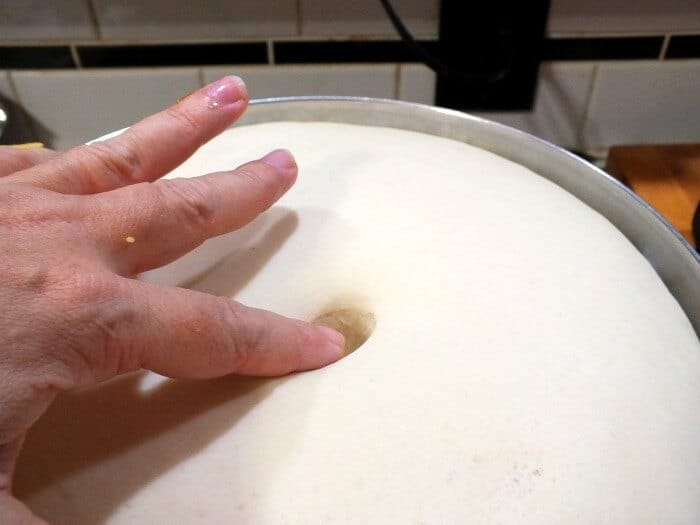
Once the dough has risen enough (doubled in size) you can gently push your finger into it to make a dent and the dent won't fill back in.
If it feels elastic or pushes back against your finger give it a few more minutes.
When it has doubled you make a fist and punch it to flatten it out. You then knead it for a few minutes to get as much air out as possible. This will ensure that the bread doesn't have big air pockets.
Second Rising
Once you've gotten the air out you'll want to let it rise again. Let's go back to the science lab a minute.
Remember, yeast is a living organism so while it was rising the first time the yeast cells were doubling, too. Now it has twice as much yeast living in it as it did before.
What does that mean to you?
Well, for one, it will rise much faster than the first time. All of those extra yeasties are making their own carbon dioxide gas.
The extra gas bubbles also mean that the bubbles are smaller and the grain of the bread is more finely textured.
The second rising usually takes no more than 45 minutes-often only 30. If you haven't already, this is a good time to clean up the kitchen.
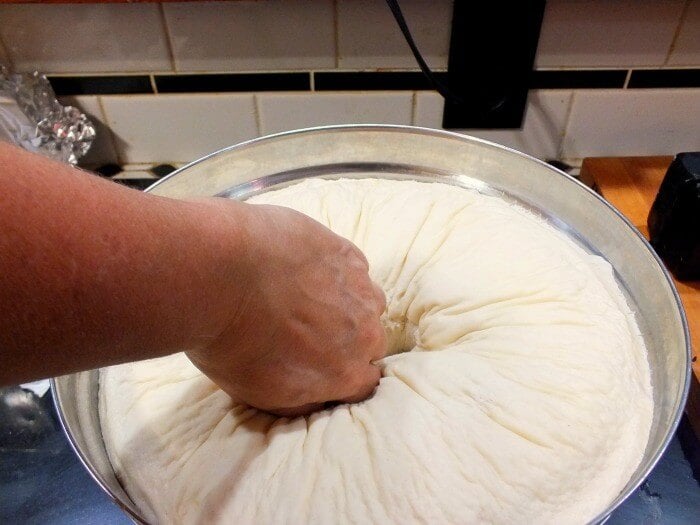
Punch It Down Again
Now, you are just going to punch it down like you did the first time. This time let the dough rest for 5 to 10 minutes, covered with that damp tea towel. This gives the gluten time to relax and makes it easier to shape your dough.
Check to make sure your recipe has these. If it leaves out sugar, salt, or both you can leave it out, too.
Run it to trouble? Let's figure it out!
If you ran into trouble with your loaf and can't figure out what happened be sure to check out the Bread Baking Troubleshooting Guide!
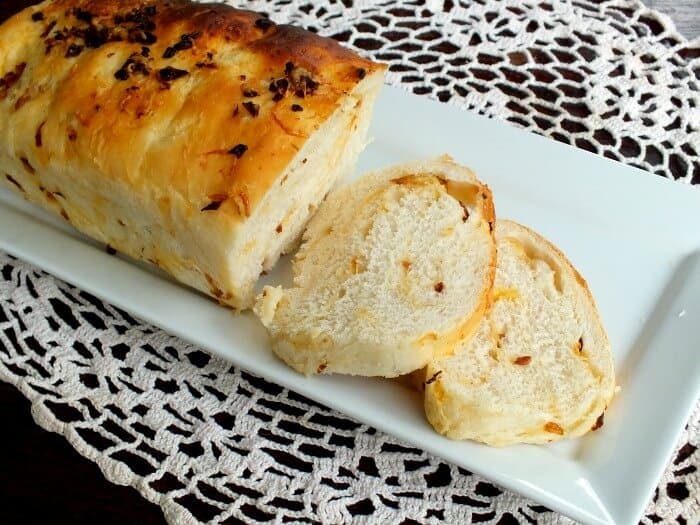
Final Shaping
Gently work your dough into a loaf shape and then tuck the ends underneath.
There are several ways to do this but the two most often used are:
- Roll it into a rectangle as wide as your bread pan is long. Roll up tightly like a jelly roll, pinch the seam on the bottom to seal, and tuck the ends under.
- Just squeeze it into shape with your hands, tucking the ends under.
Place the loaf in a greased 8'X4" loaf pan (or the size called for in the recipe) and grease the top. You can use melted butter or oil for this.
Final Rise
You are going to let it rise one more time.
Cover the loaf with a warm, damp tea towel and put it in a warm spot.
Let it rise until it just barely comes above the loaf pan and the pan feels light when you lift it. This can take anywhere from 30 minutes to an hour.
The Crust
While the dough is rising go ahead and preheat your oven to the temperature specified in your recipe.
You can also prepare a "wash" to be brushed on the loaf just before baking. Each wash achieves a different type of crust.
Types of washes for bread
- Soft & buttery. Melted butter brushed on the loaf before and after baking makes a soft, buttery crust that is rich and delicious.
- Shiny & golden. A whole egg can be beaten with a tablespoon of water and then brushed on he top. This results in a shiny, golden brown crust.
- Shiny & crispy. An egg white can be beaten with 1 ½ teaspoons of water to create a shiny, slightly crispy, light crust.
- Soft & golden. An egg yolk can be beaten with two teaspoons of water to make a soft, golden crust.
- Soft & matte. A milk wash will make the crust dark brown, soft, and more of a matte.
- Crispy. Water brushed on the crust before baking makes the crust crispier.
You can also achieve a very soft crust by covering the bread with a dry tea towel as it cools.
You can achieve a very crisp crust by leaving the bread in the oven with the oven turned off for ten minutes after the suggested baking time.
Baking
Bake the bread for the suggested time.
If it seems to be browning too much, place an aluminum foil tent over it. The bread is done when you can tap the top or bottom and it sounds hollow.
You'll know it when you hear it, I promise. If you have an instant-read thermometer it will read 190F degrees when inserted in the center of the loaf.
Cooling
Let the bread cool in the bread pan for about 5 minutes and then take it out and let it cool completely.
If you cut bread while it is hot you'll just mash it down. At least try to give it fifteen minutes.
Always use a really sharp bread knife and cut with a sawing motion for the best results.
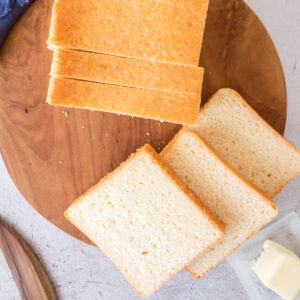
Homemade bread that has been properly kneaded, risen, and baked can be cut almost paper thin without breaking.
Storing
Store your bread in a sealed container for a day or two. You can freeze it for longer storage.
If you want to make the dough ahead of time you can usually let it rise the second time in the refrigerator overnight covered with oiled plastic wrap. You can also freeze the unbaked dough (shaped or not as you wish). Just remember to double your yeast if you are planning to freeze unbaked bread dough.
Whatever you do don't refrigerate your bread. It will dry out pretty quickly. Learn more about storing yeast dough and baked bread in this article.
📚 Bread recipes to practice with

First published in 2 parts March 5, 2014. Last updated, bring both parts together, improving readability, and more information June 28, 2024.
Trish Crossley says
Hi there
I’m from the U.K. so is possible to give the measurements in kilos/grams/millimeters please as well as cups/spoons. For instance how much is 2 tablespoons of butter in grams?
Thank you
Marye says
Hi! I test and develop all of my recipes using U.S. measurements (cups, spoons, and ounces), so that’s what I’m able to provide accurately. If you prefer metric, a trusted conversion chart or kitchen scale may help. Thanks so much for understanding!
Karen says
Love your post , I make sourdough ,and any little bit of information I collect helps after spending 10 years of trying . Thanks