

First published August 2008. Last updated April 14, 2024 for editorial improvements.
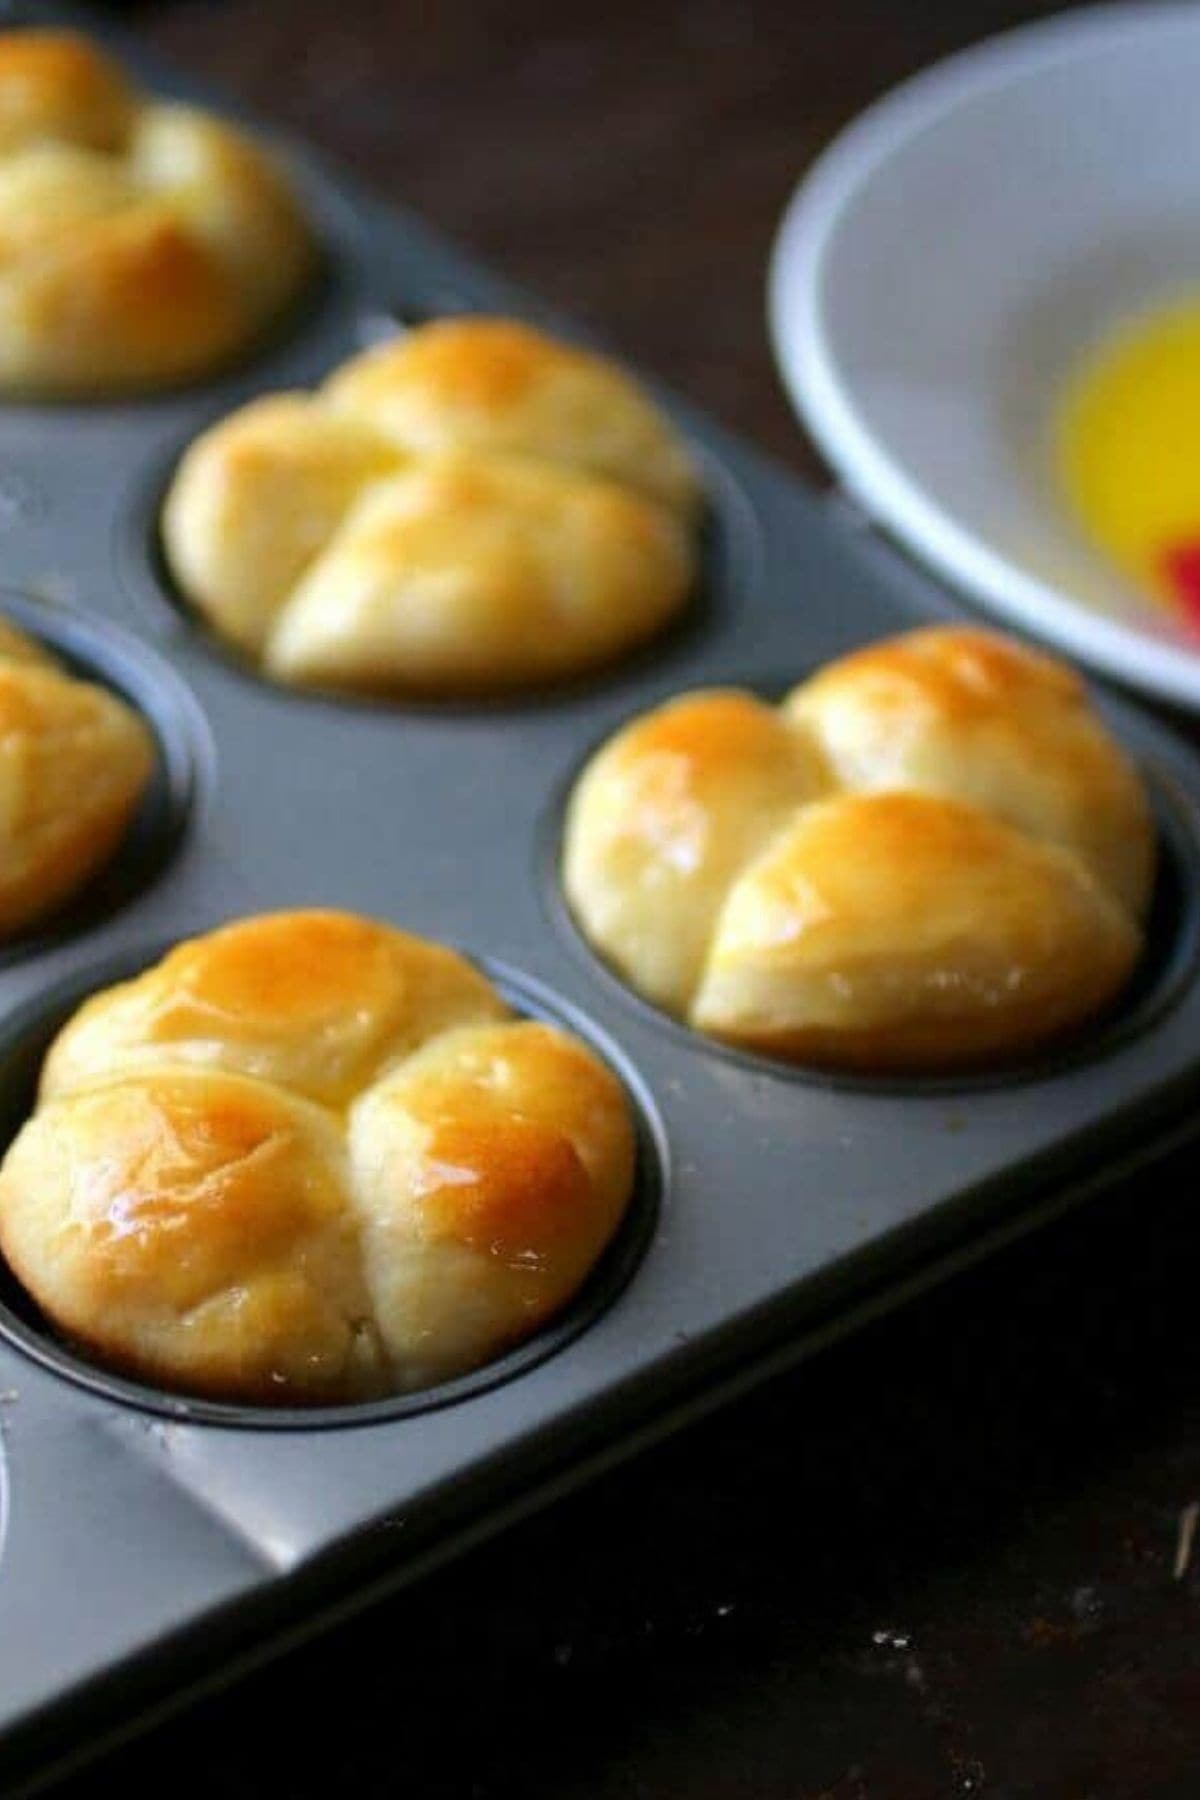
Table of Contents
- 🎥 Watch and cook: step-by-step video tutorial
- I think these are perfect
- 📖 Recipe
- 🧾 Gather your ingredients: what you'll need
- 🔪 Step-by-step shaping guide: instructions for success
- 💭 Insider tips: things to know
- How to make copycat brown and serve rolls
- 📖 Make it your own: yummy variations
- 👩🍳 Let's answer those questions: FAQs
- 🍽️ No waste: creative ways to repurpose cloverleaf rolls
- 📚 More Southern comfort: related recipes you'll love
- 💬 Comments
🎥 Watch and cook: step-by-step video tutorial
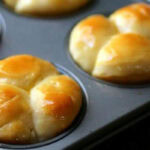
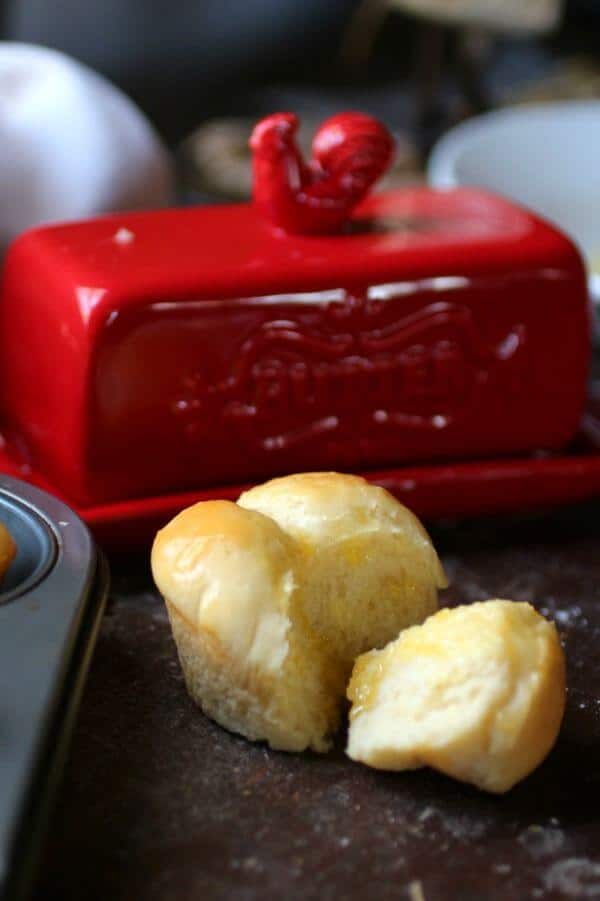
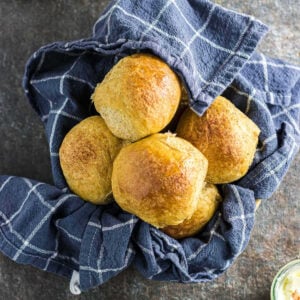
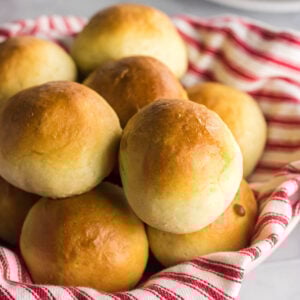
These classic cloverleaf rolls are old-fashioned perfection-light, fluffy, buttery, and just sweet enough to make you feel like Grandma's whispering secrets in your ear. They're easy enough for everyday, yet fancy enough for holidays, and those pull-apart edges? Built-in butter traps. Don't skip the brown-and-serve roll hack down below-it's a game changer for make-ahead magic.
If you don't have much experience with yeast baking these are a great place to start - you might also want to read through my guide to homemade bread baking for the answers to any questions you might have.
📖 Recipe
Old Fashioned Cloverleaf Rolls
Print Pin Recipe Rate RecipeIngredients
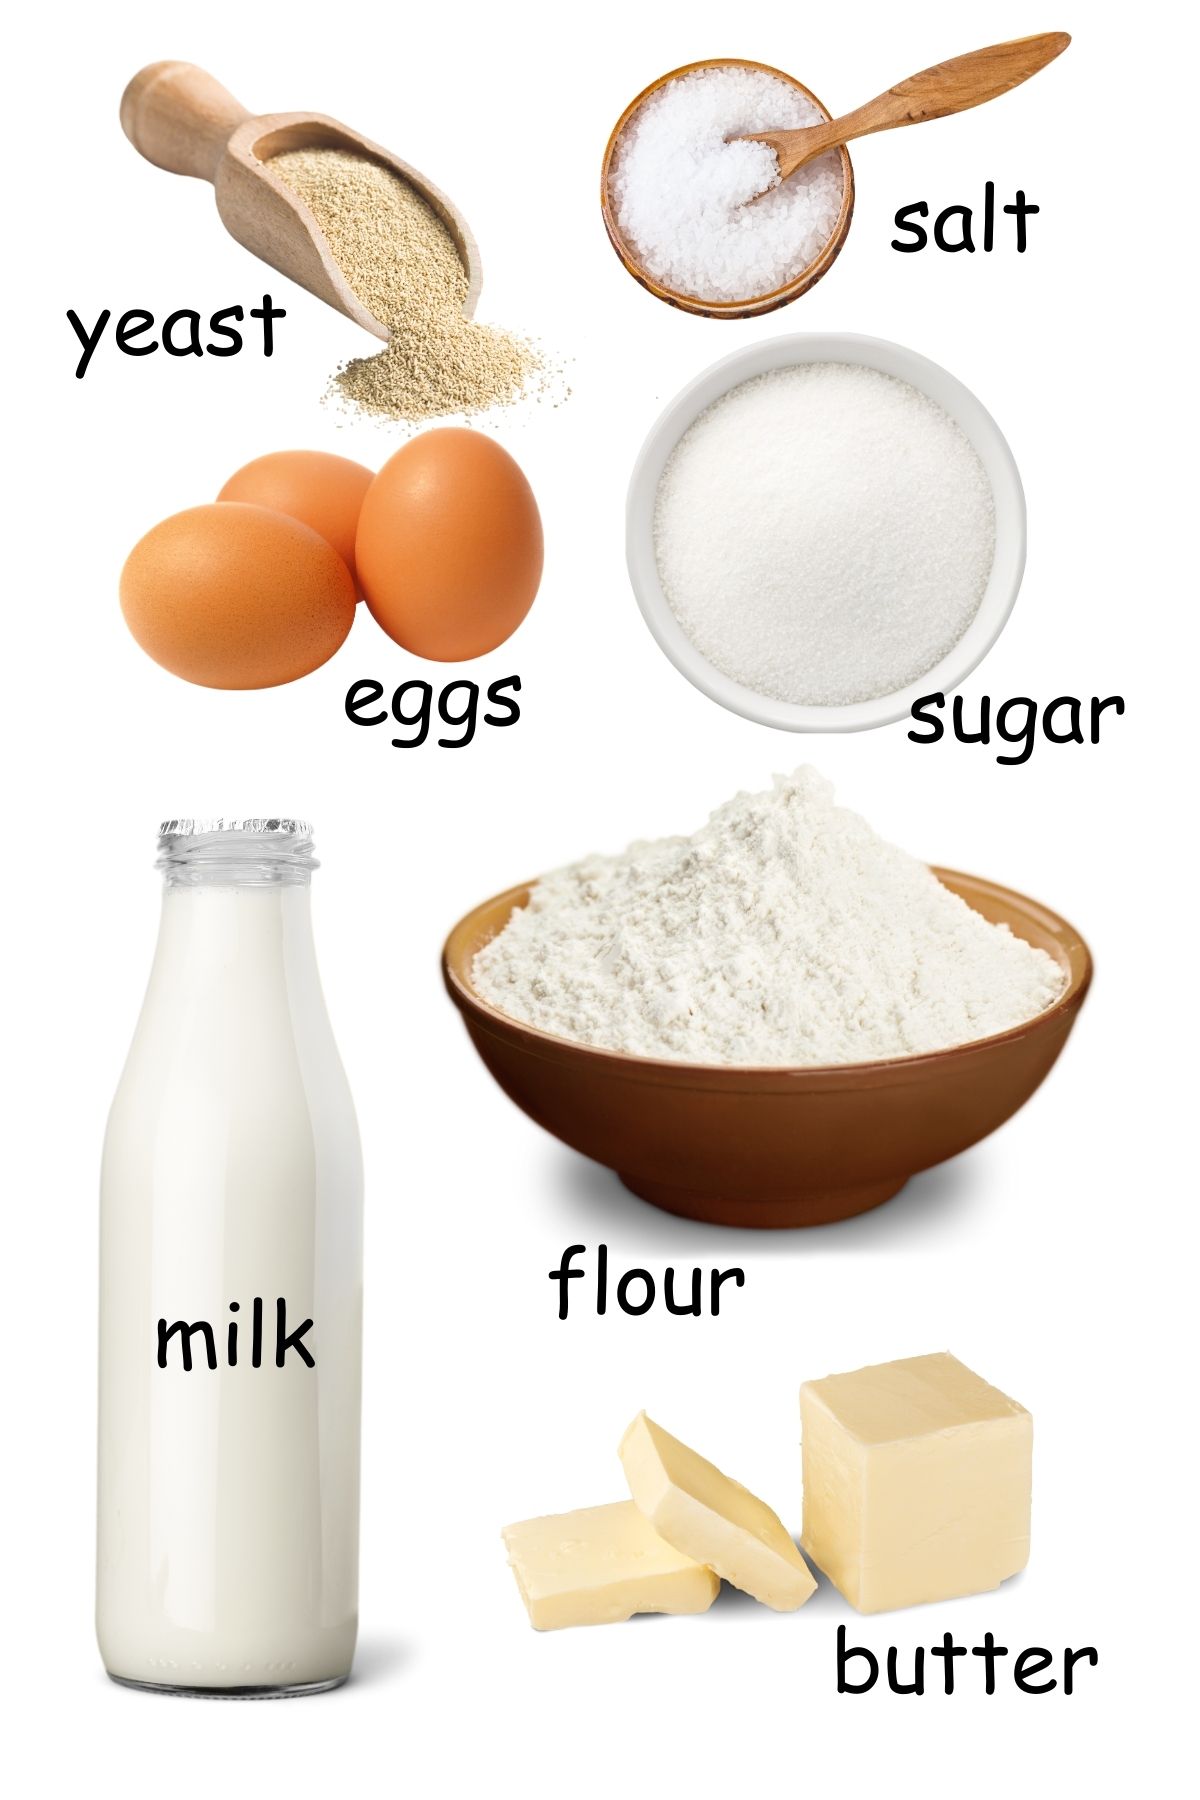
- 2 packages yeast, active dry yeast
- ½ cup water, 110°F
- 1 teaspoon sugar
- 1 ½ cups milk, 110°F
- ½ cup sugar
- 1 large egg, room temperature
- ½ cup butter, melted - divided use
- 2 teaspoons salt
- 5 ½ cups all-purpose flour
Instructions
- In a small bowl or measuring cup dissolve the active dry yeast in the warm water with 1 teaspoon of sugar.
- Set aside in a warm place for 5 minutes and allow to foam up. This is called "proofing".
- Beat milk, ½ cup sugar, and egg in the large bowl of a stand mixer fitted with the paddle attachment.
- Stir in ½ cup of flour.
- Add the yeast mixture.
- Add ¼ cup of the butter and the salt and mix well.
- Add 1 ½ cups of flour and beat until smooth.
- Stir in enough remaining flour to form a soft dough.
- Turn onto a floured surface and knead until smooth about 6-8 minutes or knead in your stand with the dough hook mixer according to manufacturer's instructions - usually about 2-3 minutes.
- Put the dough in a greased bowl. Grease the top and cover it with plastic wrap or a clean kitchen towel or tea towel.
- Allow to rise in a warm spot for about an hour, or until doubled.
- Punch dough down.
- Spray muffin tin with nonstick cooking spray.
- Roll into 72 equal sized small balls for 24 rolls.
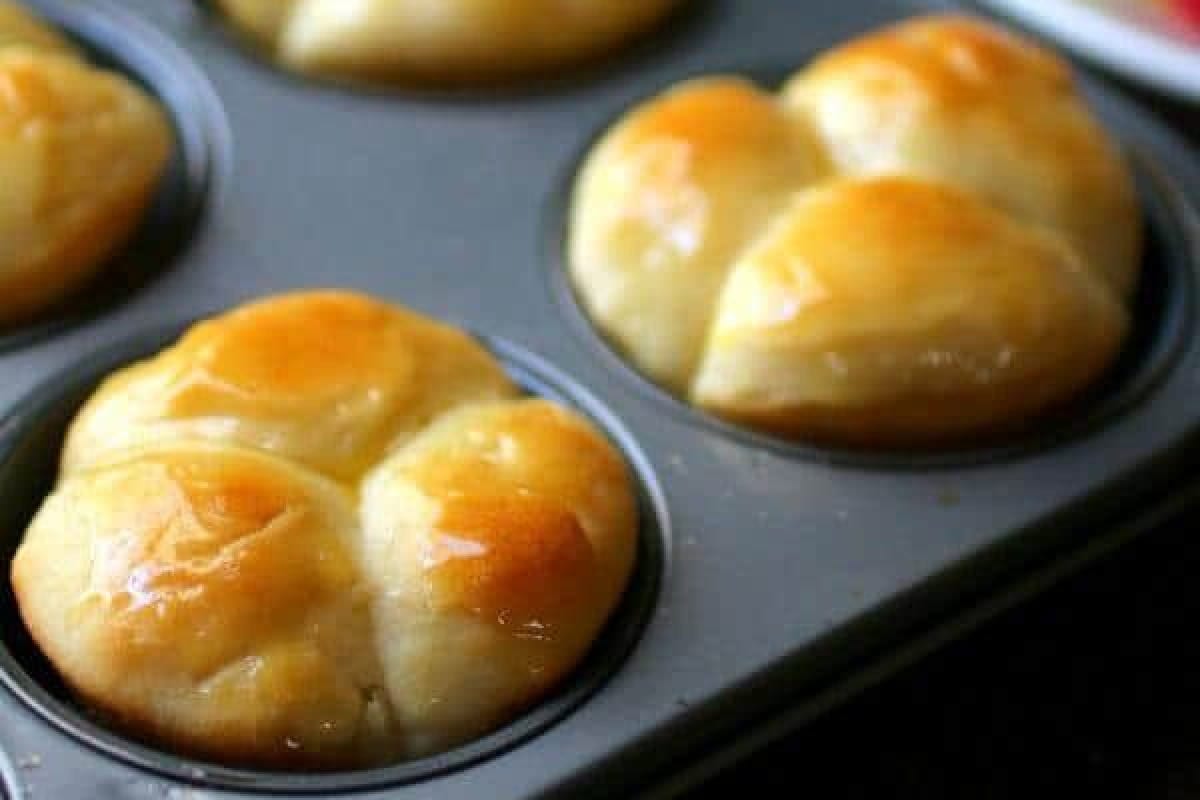
- Dip the balls in the remaining melted butter and place three in each greased muffin cup.
- Cover and let rolls rise in a draft-free place until doubled, about 45 minutes.
- Bake rolls at 375 degrees for 12-15 minutes or until golden brown.
- Brush the top of the rolls with melted butter.
- Serve with butter or honey butter.
Notes
Nutrition Facts
Nutrition information is estimated as a courtesy. If using for medical purposes, please verify information using your own nutritional calculator. Percent Daily Values are based on a 2000 calorie diet.
This recipe has been tested several times. If you choose to use other ingredients, or change the technique in some way, the results may not be the same.
Love this recipe?
Subscribe to the free membership group and never miss another recipe!
No time? Try these 30 minute yeast rolls!
🧾 Gather your ingredients: what you'll need
⏲️ Marye's time saving hacks -
You can let the dough rise in the refrigerator overnight before shaping. Be sure to oil the dough well and cover the bowl with a piece of plastic wrap that's been sprayed with non-stick cooking spray.
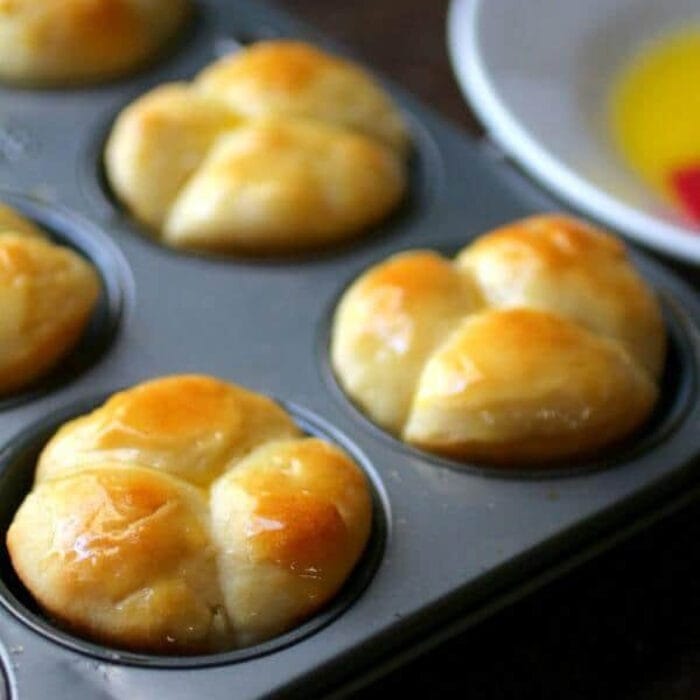
🔪 Step-by-step shaping guide: instructions for success
For a visual review of how to make these simple rolls check out the video above.
You'll shape the rolls after the first rising and the technique couldn't be easier. Here's what I do -
- Divide the dough into 24 equal pieces. For exact results weigh each piece of dough and make sure it weighs close to the same.
- Divide each piece in 3 equal pieces.
- Roll into balls.
- Butter 24 muffin cups.
- Dip each piece of dough in melted butter and place three balls in each muffin cup.
- When they rise they form the clover. If you want you can even use two kinds of dough like white and dark whole wheat -- it looks pretty cool.
- Brush with melted butter.
- Bake.
- Brush with melted butter.
See? Easy as pie.
🤫 Marye's secret for zhuzhing it up -
Lightly brush the tops of the unbaked rolls with a mixture of 1 egg yolk mixed with 1 tablespoon water (instead of melted butter) then sprinkle with sesame seeds or poppy seeds for a pretty presentation.
zhuzh: verb. To make something more interesting or attractive
💭 Insider tips: things to know
- Use fresh yeast: Check the expiration date and don't skip proofing your yeast by mixing it with warm water and a pinch of sugar. It should bubble and foam within a few minutes. This way your rolls will rise beautifully every time.
- Let the dough rise fully: Allow the dough to double in size during the first rise for optimal texture. If your kitchen is cool here are some ideas to make the dough rise faster.
- Measure flour correctly: Too much flour can make rolls dense. Spoon flour into your measuring cup and level it off with a knife.
- Warm liquids and ingredients: Use warm (100F-110F) milk, butter, and water. Cold ingredients can slow down the yeast, while overly hot liquids can kill it.
- Knead the dough well: Knead until the dough is smooth, elastic, and springs back when pressed lightly. This helps develop gluten, which gives your rolls a soft, chewy texture.
- Divide dough evenly: For uniform rolls, use a scale or eyeball to divide the dough evenly into balls. This makes for a professional-looking result and ensures even baking.
- Use a greased muffin tin: Greasing your muffin tin will prevent sticking and allow for easy removal. It also helps each roll hold its signature cloverleaf shape. I just use non-stick cooking spray.
- Brush with melted butter: Brushing the dough balls with butter before baking adds flavor and gives the rolls a gorgeous, golden finish.
- Bake until golden brown: Avoid over-baking, as this can dry out the rolls. Bake until they're just golden on top unless you're making the brown-and-serve version. An instant-read thermometer will register 195F - 200F when stuck in the center.
- Serve fresh or store properly: For the best texture, serve rolls warm right out of the oven. If you need to store them, wrap them tightly in plastic wrap or place them in an airtight container. Reheat gently before serving.
How to make copycat brown and serve rolls
You can even make your own homemade, brown-and-serve type rolls with this recipe. Just follow these easy steps -
- Bake them for about 8 minutes or until they are done but haven't started to brown. The middle will register 195F on an instant-read thermometer.
- Remove from the oven and let cool completely.
- Put them on a cookie sheet and freeze until they are frozen solid.
- Store them in the freezer in airtight containers until ready to serve.
- When ready to serve just put the frozen rolls on a cookie sheet and bake them at 375F until golden - about 5 minutes.
Wear pearls and high heels to dinner. You'll feel just like Mrs. Cleaver.
📖 Make it your own: yummy variations
- Substitute whole wheat flour for half the white flour called for. Remove 1 tablespoon of flour from each cup and replace it with 1 tablespoon of gluten to keep the rolls soft.
- Dip the dough balls in melted butter mixed with garlic, Parmesan, Italian herbs mix, sugar and cinnamon, or even chili powder before putting them in the muffin tins.
- When making the dough balls push your finger into each one to make a hole. Insert a mini marshmallow that has been rolled in cinnamon sugar. Form the dough ball around the marshmallow to enclose it completely. Bake as directed.
I've made them with all kinds of variations. I've used whole wheat flour, half whole wheat flour, honey... you name it. All of the variations are delicious, but I keep coming back to the basic, old-fashioned cloverleaf roll. I don't know -- there's just something about them that's perfect.
👩🍳 Let's answer those questions: FAQs
Have other questions? Ask me in the comments!
Cloverleaf rolls go in the oven for 12 minutes or so.
It's not hard to make light, fluffy rolls ... when you know how -
Use whole milk for the liquid.
Make sure the dough is kneaded well and rises properly before baking.
Follow the recipe carefully.
Don't overbake.
Brush the tops with melted butter and cover them with a clean tea towel when they come out of the oven to keep them soft.
🍽️ No waste: creative ways to repurpose cloverleaf rolls
- Make Bread Pudding: Tear the rolls into pieces and use them instead of bread in this yummy pumpkin bread pudding recipe. Perfect for dessert or a decadent breakfast!
- Transform into Croutons: Cut the rolls into cubes, toss them in olive oil, salt, and your favorite herbs, then bake until crispy. These homemade croutons add crunch to salads and soups.
- Turn into Mini Breakfast Sandwiches: Slice the rolls and layer with scrambled eggs, cheese, and your favorite breakfast meat. Toast until warm and melty for a quick, delicious breakfast.
- Make Garlic Bread: Brush the rolls with garlic butter, sprinkle with a little Parmesan or mozzarella, and bake until golden. Serve with pasta or soup for an easy, comforting side dish.
These ideas make sure every last roll is put to delicious use!
When I was growing up we always had the kind of cloverleaf rolls that you buy at the store and brown in your oven -- and only on holidays. I was always happy to stack a couple on my plate when they were passed.
To steal a phrase from one of my sons - I thought they were the bombdiggity with two scoops of koo-koo-kachoo. Well I did right up until the fateful day I found out you can make them from scratch!
OMG -- homemade is so much better - I was totally hooked.
These are an easy roll to make and most people really like them because the shape is so...home. There is just something about light, buttery rolls that makes you think of chilly days, pot roast, and apple pie -- or is that just me?
When you pull it open the fragrance of sweet, yeast bread surrounds you. The crumb is small and delicate and one look tells you just how good that first bite is going to be. I usually have to "test" one before they get to the table -- after all what if they were terrible?
But they never are.
No time for a true yeast roll? Try this angel biscuits recipe!
📚 More Southern comfort: related recipes you'll love

Don't lose this recipe!
Pin to your favorite Pinterest board to keep it handy.


Janet says
I have made these for Christmas the past 2 years. Family love them, they say they're like brioche. Making some today. Going to try as whole roll, not clover. Fingers crossed
Holley Woods says
My mom used to make clover leaf rolls every Thanksgiving and Christmas, this was the one tradition that everyone looked forward too. I have tried 3 other recipes with no success, they weren't as fluffy and tasty. These are exactly what my mom would make but I had lost the recipe book that it came in. Thank you so much for this wonderful trip through beautiful memories with my family and now It's my turn to carry the torch for my family. God bless you!
Holley says
Over the last couple of weeks I have tried 3 other recipes for the old fashioned clover leaf rolls, they didn't taste like the way my mom used to make them. So in my last effort I tried this recipe and it was spot on. Everyone in my family who knew my moms clover leaf rolls knew these were it. Thank you so much for making our Thanksgiving so much better.
Leeann says
I want to make these for Thanksgiving. We are eating at noon. Since I only have one oven I thought I would make them the day before and just gently warm right before serving. OR will they raise in the frig overnight and bake them very early morning
Marye says
You can make brown and serve rolls with these instructions. Make them now, freeze and toss in the oven 10 minutes before dinner is ready -https://www.restlesschipotle.com/thanksgiving-make-ahead-recipe-buttermilk-dinner-rolls/
James says
These rolls are amazing, the recipe is easy to follow, I have made them 3 times , they alsways come out perfect. I have also haved the recipe with great results. Thanks so much to Marye.