
We did the taste test of all taste tests yesterday. I made Red Velvet cupcakes twice, once with beets for the red color and once with the red dye. I used the same recipe both times, with the exception of the beets vs. the dye.
I was "rooting" for the beets. Get it? Rooting?
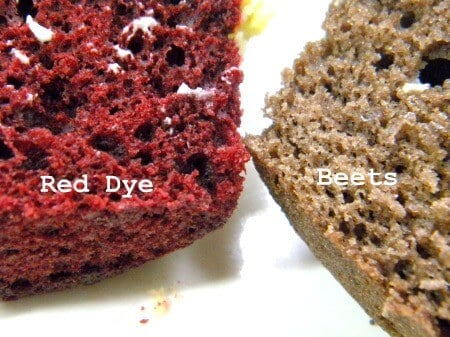
The beet option was not better. It was awful. I had made red velvet cake with both items before but never at the same time, with the same recipe. The beets made the chocolate more brown but it was drier. The red food dye did what it was supposed to do. For both of the recipes I adapted the Red Velvet Cake recipe in the Hummingbird Bakery Cookbook. So, much as I want to say that natural is better... I can't. If you want red velvet cake, and you want it to be red and good..you are going to need to do the old fashioned thing and go with dye.
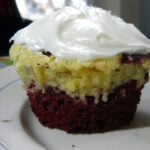
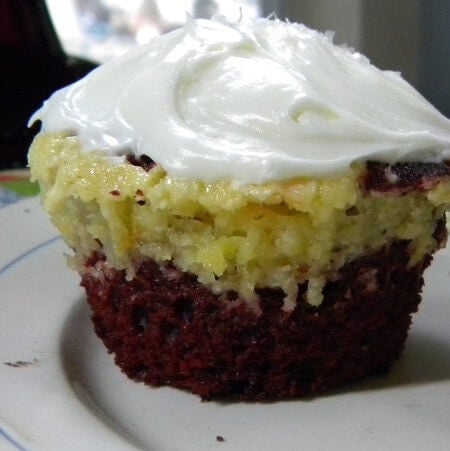
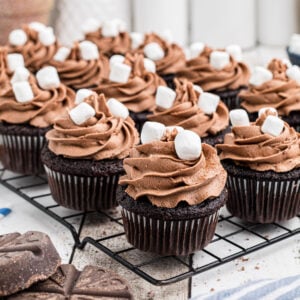
Now, the rest of it...imagine biting into rich red velvet cupcake and finding orange cheesecake. The combination of chocolate and orange is fantastic anyway, and the tangy citrus and cream cheese cuts the sweetness of the cream cheese frosting and red velvet cake perfectly. I loved these. My family loved these. You are going to love these!
Be careful not to overbake. You want the cheesecake to remain creamy...and it will cook for a little bit as it cools.
I usually use silicone baking cups, but since I was doing a double batch I didn't have enough. I used paper ones...but I turned the water off when I brushed my teeth and I didn't rinse...so it evens out.
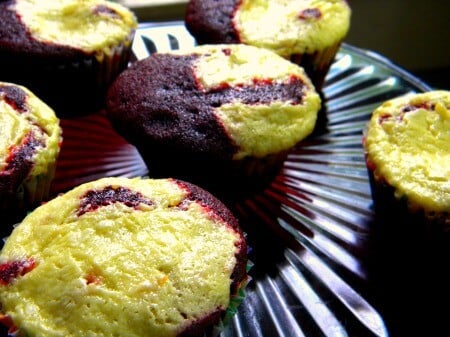
The list of directions looks long, but it is really quick and easy. These are so awesome and they take no more time than a regular cupcake. Yum!
📖 Recipe

Red Velvet/Cheesecake Marbled Cupcakes
Print Rate RecipeIngredients
Orange Cheesecake
- 1 4- oz package of cream cheese, , room temperature (not low fat)
- 2 tablespoons of freshly grated orange peel
- ½ cup sugar
- 1 egg
- ½ teaspoon vanilla
Red Velvet Cake
- ¼ cup unsalted butter
- 1 cup sugar
- 1 egg
- 3 tablespoons dark cocoa powder
- 4 oz food grade red food color
- 1 teaspoon vanilla
- ½ cup buttermilk
- 1 cup plus 2 tablespoons all purpose flour
- ½ teaspoon of baking soda
- 1 ½ teaspoons white vinegar, (it has less flavor than any other type)
Cream Cheese Frosting
- 4 cups confectioner's sugar
- ⅓ cup unsalted butter
- 8 oz cream cheese
Instructions
Before Mixing
- Preheat oven to 325F.
- Add cupcake liners to pans
Orange Cheesecake
- Beat together until creamy and well blended.
- Do not whip because you don't want to incorporate air.
Red Velvet Cake
- Cream the butter and sugar until fluffy.
- Add the egg and vanilla and beat well.
- Use a rubber scraper to pull any remaining butter mixture off the sides and bottom of the mixing bowl.
- Mix again until well blended.
- In a separate bowl mix the food color and the cocoa until it makes a paste.
- Add the cocoa mixture to the butter mixture and mix until it is evenly blended.
- Spoon through to check for streaks.
- Add ¼ cup of the buttermilk and beat on low speed until blended.
- Add half of the flour and blend.
- Add the remaining buttermilk, blend and then add the remaining flour.
- Now stir in the baking soda and vinegar
Assemble
- Fill muffin cups about ¾ the way with the red velvet batter.
- Add a tablespoon or so of cheesecake batter to the top.
- Bake for 20-25 minutes, or until cupcakes are firm to the touch. Don't overbake.
- Cool completely.
- Cover with frosting
Cream Cheese Frosting
- Mix butter, salt, and confectioners sugar until crumbly.
- Add the cream cheese and beat until creamy, add a little cream if you need to to get the right consistency.
- Swirl a good layer atop the cooled cupcakes.
- Sprinkle with cocoa, edible glitter, or orange zest.
- Keep any remaining cupcakes (as if!) in the refrigerator.
Nutrition information is estimated as a courtesy. If using for medical purposes, please verify information using your own nutritional calculator. Percent Daily Values are based on a 2000 calorie diet.
This recipe has been tested several times. If you choose to use other ingredients, or change the technique in some way, the results may not be the same.
Love this recipe?
Subscribe to the free membership group and never miss another recipe!
images:marye audet
Judy palomar says
I'm a very good cook, but have never mastered my cheesecake in the humid, below sea level south. Nor did these cupcakes come out. What a disaster! They were just a total mess. I've made cakes with vinegar and baking soda...a success even in the south, so I'm assuming it is the cheesecake parts. Southern Cooks, beware!
Aileen says
I made these cupcakes this morning and it turned out amazing! Now that I read the comments, the cheesecake part did sink in the bottom and it was a bit chunky and runny when I was mixing it. I used Philadelphia cream cheese but did not wait for the temp to go down to room temp even with the butter, something I'll make sure I do next time. Overall the cupcake was delicious! I made it for a dessert party at work and I received so many compliments.
Thank you for sharing this recipe.
marye says
Oh Thank you for letting me know! Yes, you do have to let the cream cheese come to room temp so it gets blended right.
karen says
does this recipe freeze well?
marye says
I haven't frozen it.. the cake part would freeze fine but the cream cheese may get just a little grainy...
Sarah says
I'm just wondering, but if I'm not a big fan of citrus, would the cupcake still be amazing without it?
marye says
Sarah - yes. You may need to add a little more vanilla for the flavoring though.
Aya Ritchie says
I just made this cupcake and it turned out amazing!!! It is super crucial to make sure the creamcheese is at room temperature! If you try to mix it while it's still hard, it will not mix well and become lumpy! Plan ahead and be patient! Also, for the orange creamcheese, I used extra large eggs, and it did become runny. It didn't ruin my cupcake overall, but I would use small or medium eggs. That should make it a bit creamier! Also, I'm not a big fan of food colouring. I doubled this batch, and thus require 8 TABLESPOONS of red food dye. I only put in about a teaspoon of it, and it turned out nice and red.
Thanks for the recipe! Can't wait to share it with my colleagues!!!